Creating a New Project
Basic Overview
In Valsight, everything is organized into projects.
All data sources, models, and simulation workspaces are sub-contents of projects.
For each project, you can decide on a name, and an individual business key and also add a description within the first steps.
Step-by-Step Approach
In the following paragraph, a step-by-step guide will lead you through the steps of creating a project. This guide represents one option to add a new project.
A second option to add a new project is via the navigation bar settings > Projects > Create a new Project.
Adding a Project
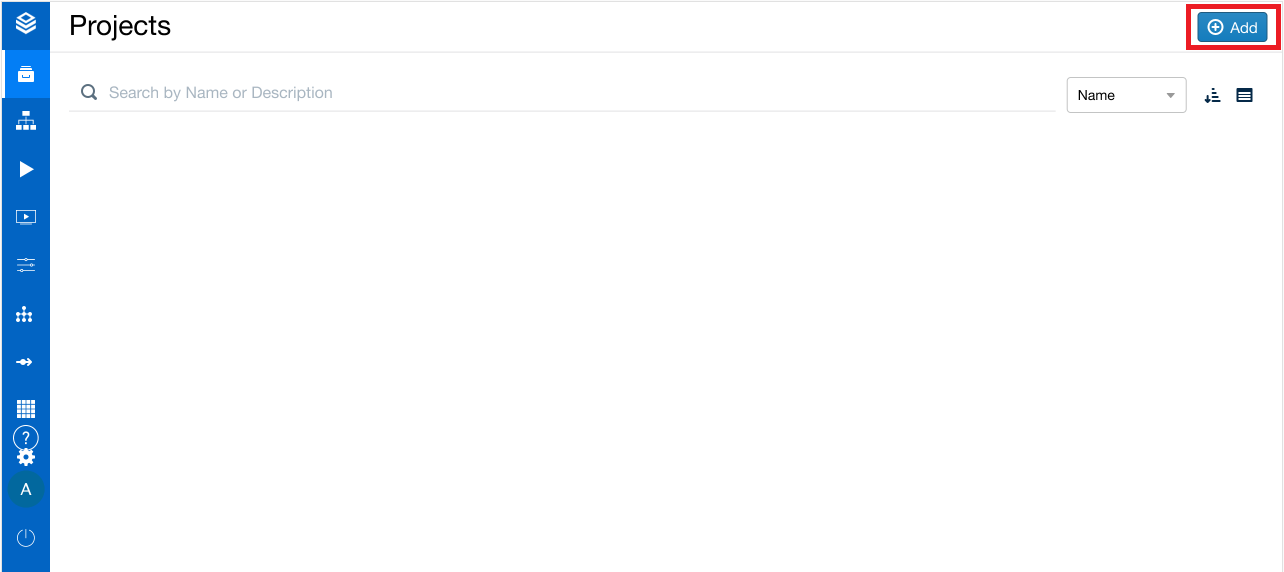
In the first step, you find yourself on the home page of Valsight - the Project overview. Here, click on the "Add" button in the upper right corner.

Project Set-up
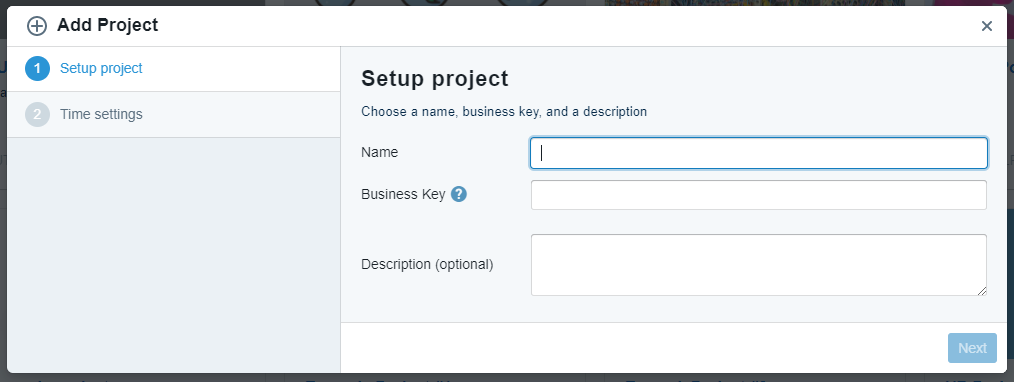
In the second step, you are asked to name your project, enter a business key and optionally also add a description to it.
More detailed information about the project settings can be found here.

Project Time Settings
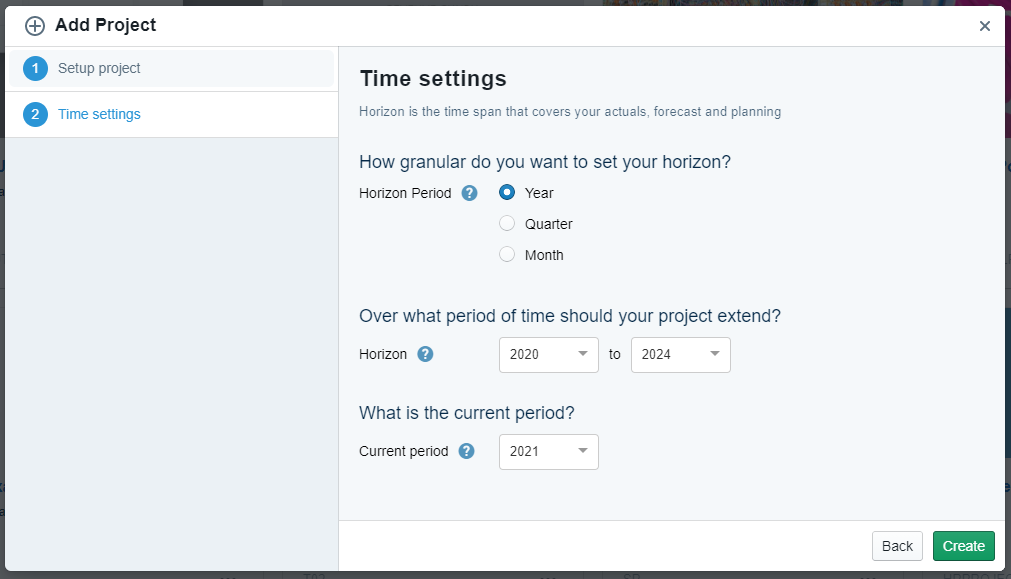
In the third step, you are asked to set the time settings for your project.
This includes the horizon period, the general horizon of your project, and the current period of your project.
After filling out these settings, you can create the project.

Another option
Another option to create a Project is via the Valsight settings > Projects > Create new Project
