Importing Scenarios
Scenarios are dynamically calculated based on data, and model logic and always reflect their active assumptions. Every scenario you create in a workspace is a dynamically calculated scenario. In contrast, imported scenarios are fixed data points that are uploaded to a project. Their values are displayed exactly as uploaded and will not change. For limitations with imported scenarios, please see the notes at the bottom.
Downloading existing Scenarios
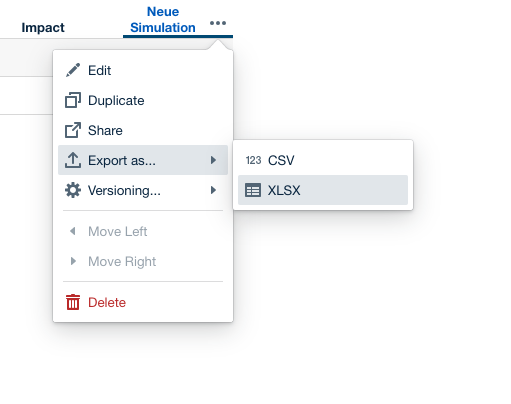
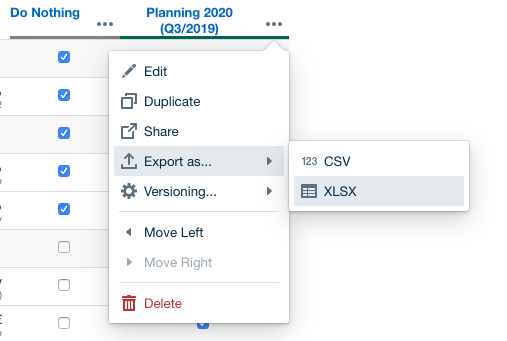
You can now download the data for existing scenarios from the Scenario Manager. In order to do that, go to the workspace, click on the scenario menu in the Scenario Manager and click on "Export as → XLSX".
Creating Imported Scenarios
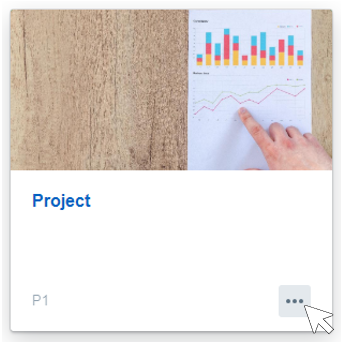
Imported scenarios are created in the context of a project using the project settings page.
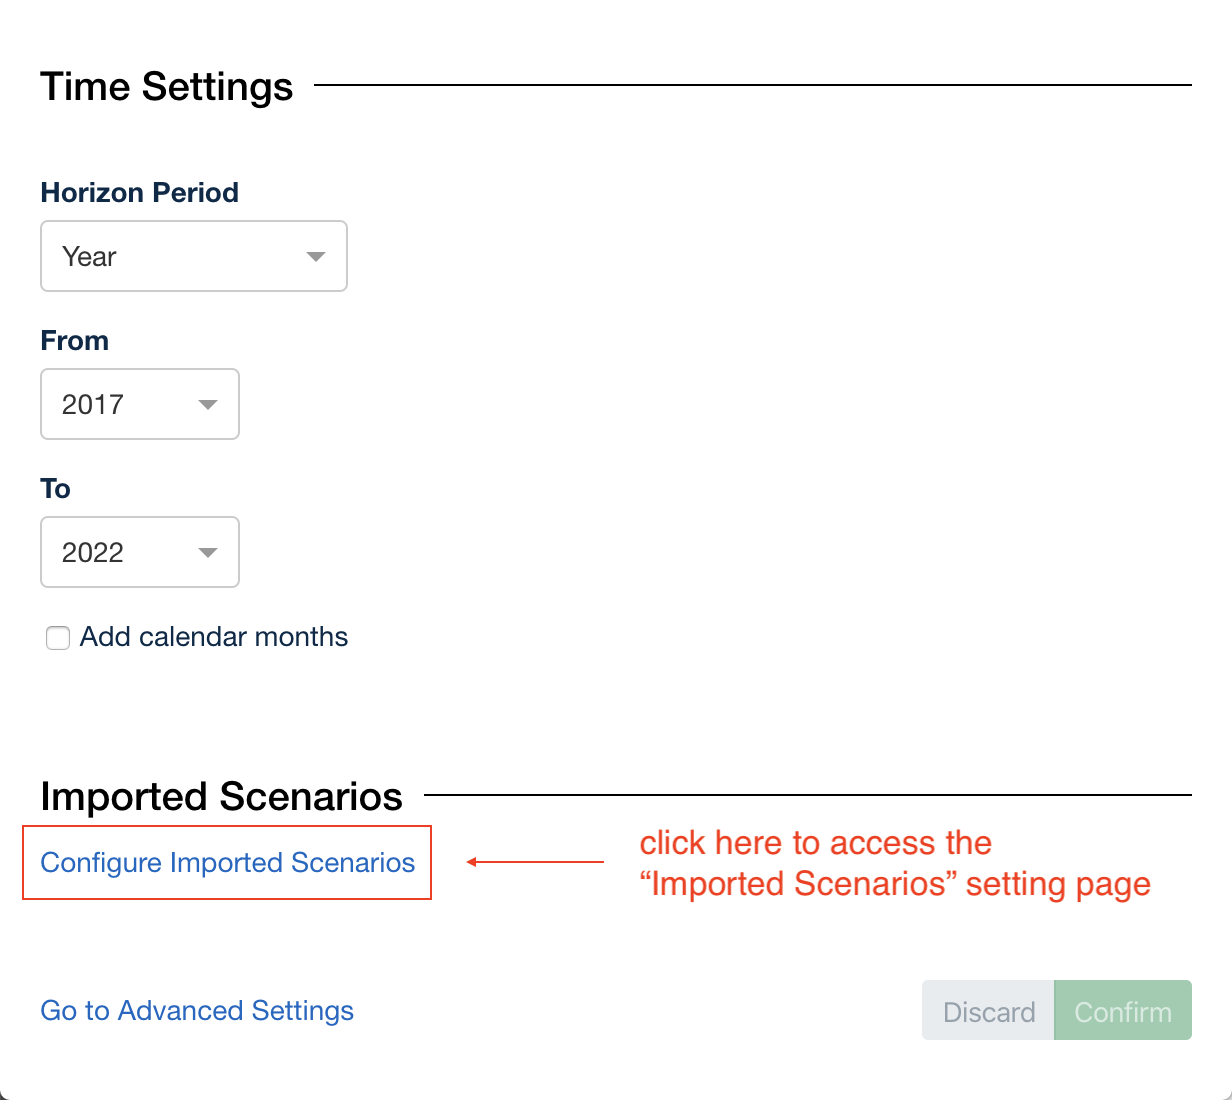
On the imported scenarios setting page, you can rename/create/delete scenarios or upload data. The names of imported scenarios have to be unique per project. Data is provided by uploading an XLSX file. On upload, the data will be matched and validated against the project dimensions (similar to the upload of data sources). On import, every sheet will be matched to a node in the project.
Mapping manually to existing Nodes
The mapping is performed using the sheet name as "'modelname'.'nodename'". If names are too long or use special signs, the mapping can be overwritten by providing a comment in the rows of the sheet that will then be used for the mapping. See the appended excel file for an example of what the comment should look like:
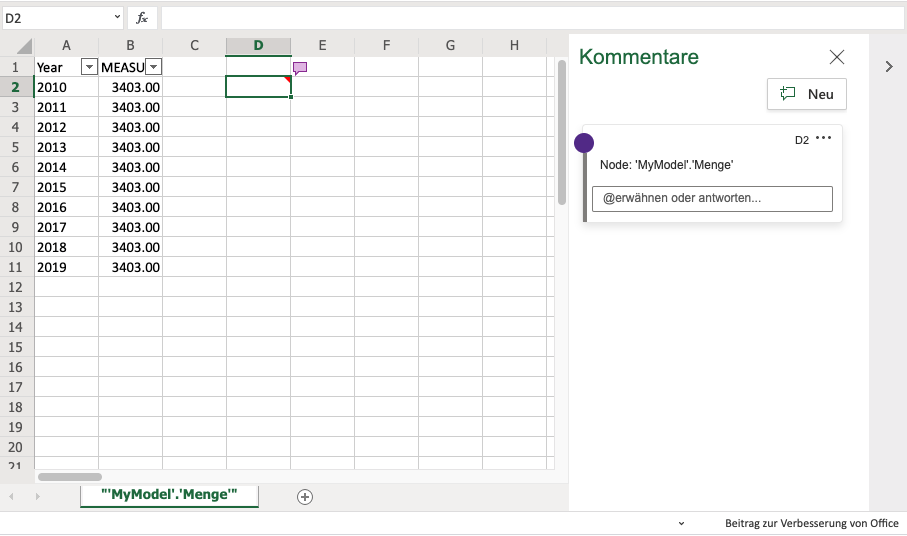
The column for the value of the node needs to match one of the following names:
'AMOUNT', 'MEASURE', 'VALUE', 'MEASURE_DISTRIBUTION'

Using Imported Scenarios in Charts
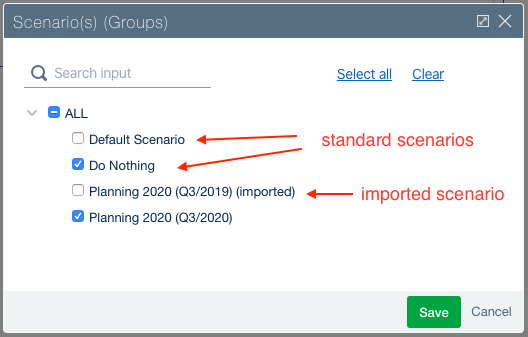
Imported scenarios are displayed next to normal scenarios when configuring charts with the annotation "imported". They can be used in any other scenario and their data will be displayed in charts. However, as data is not dynamically calculated, imported scenarios do not support the calculation of assumption effects or assumption bridges.
Importing Scenarios from another Project
You can export a scenario from another project and import it as an imported scenario. This can be helpful to add comparisons, e.g. with a forecast or previous plan. In order to export the source scenario, open the project and navigate to the Scenario Manager in a simulation workspace containing the scenario to be exported. Open the context menu of the scenario by clicking the more (...) icon next to the scenario name and choosing "Export as → XLSX". This will generate and download an XLSX file with one sheet per node. As a next step, you can now create a new imported scenario in your current project and upload the exported data as described above.
Potential challenges when importing data from other projects:
Node names might have changed between the projects. You can map the names to the new project structure by replacing the old name in the exported XLSX file (sheet names and the name comment in cell A1).
Dimensions might have changed between the projects. If dimension or level names have changed, the import will not match the information to the respective dimensions and the data can not be analyzed using the dimension information. If values do not match, the upload will fail with errors that have to be resolved by replacing the old dimension values in the exported XLSX file with the new values matching the current project dimensions.
Limitations
Imported scenarios are pre-calculated and should always show the numbers independent of the project where they are imported in.
Aggregation settings of nodes are currently not part of imported scenarios and the nodes setting of the current model is used.
RATIO functions are not supported as part of imported scenarios. On import, the division will be calculated on the lowest level and is aggregated depending on the query.
Imported scenarios do not contain assumptions and can therefore not be used to analyze assumption effects (e.g. in bridges).
