Project Rights
On this page, we will show you how to edit and manage project permissions in Valsight. As an example we want to grant a user "test.user" the right to work on the project "50 Sky Automotive" in a model and a workspace.
For more details on the effects of permissions, read the documentation page on Access Rights.
Edit and manage Project Permissions
Select the Project
To get started, select the menu entry "Configuration". Now select the project that you want to change permissions for from the list on the left (We will select "50 Sky Automotive"). Then select "Security".
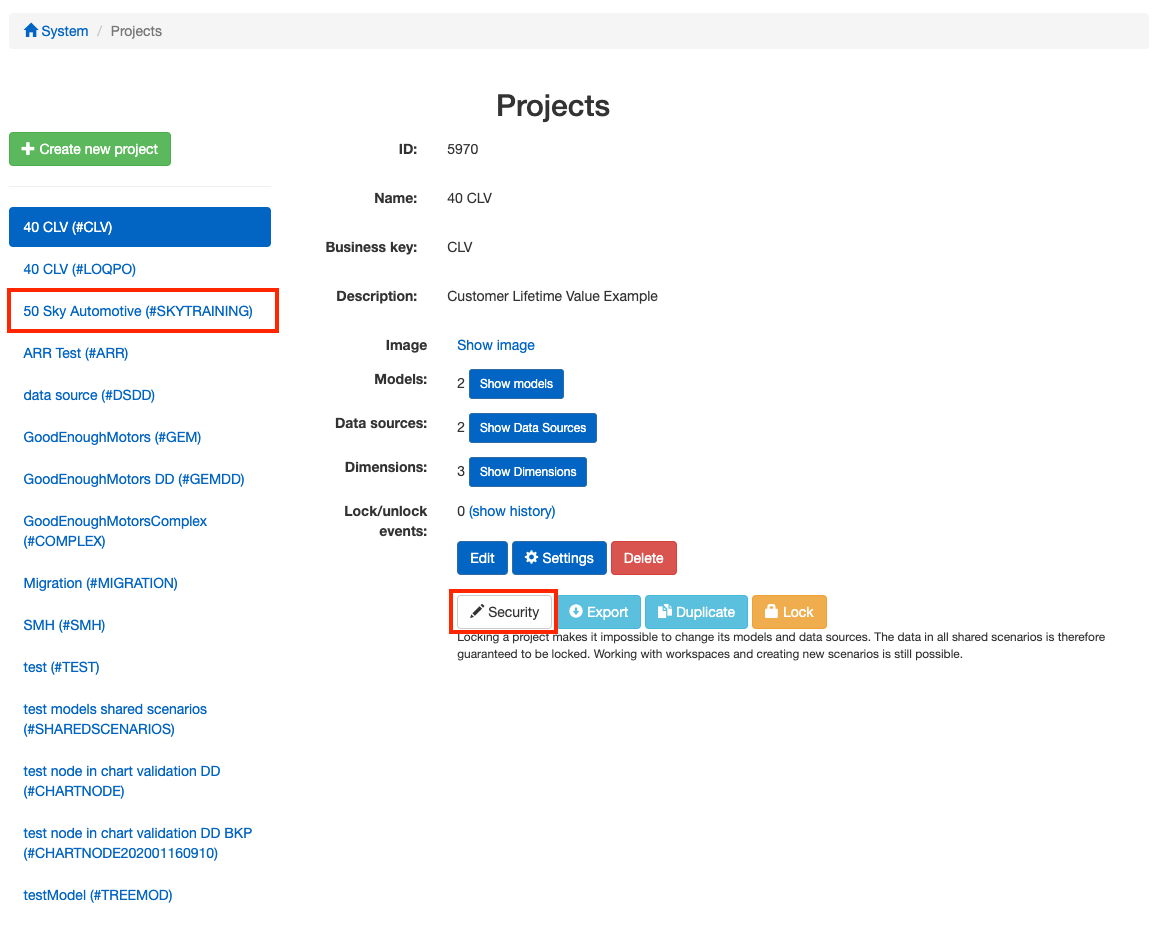
Modifying Project Rights
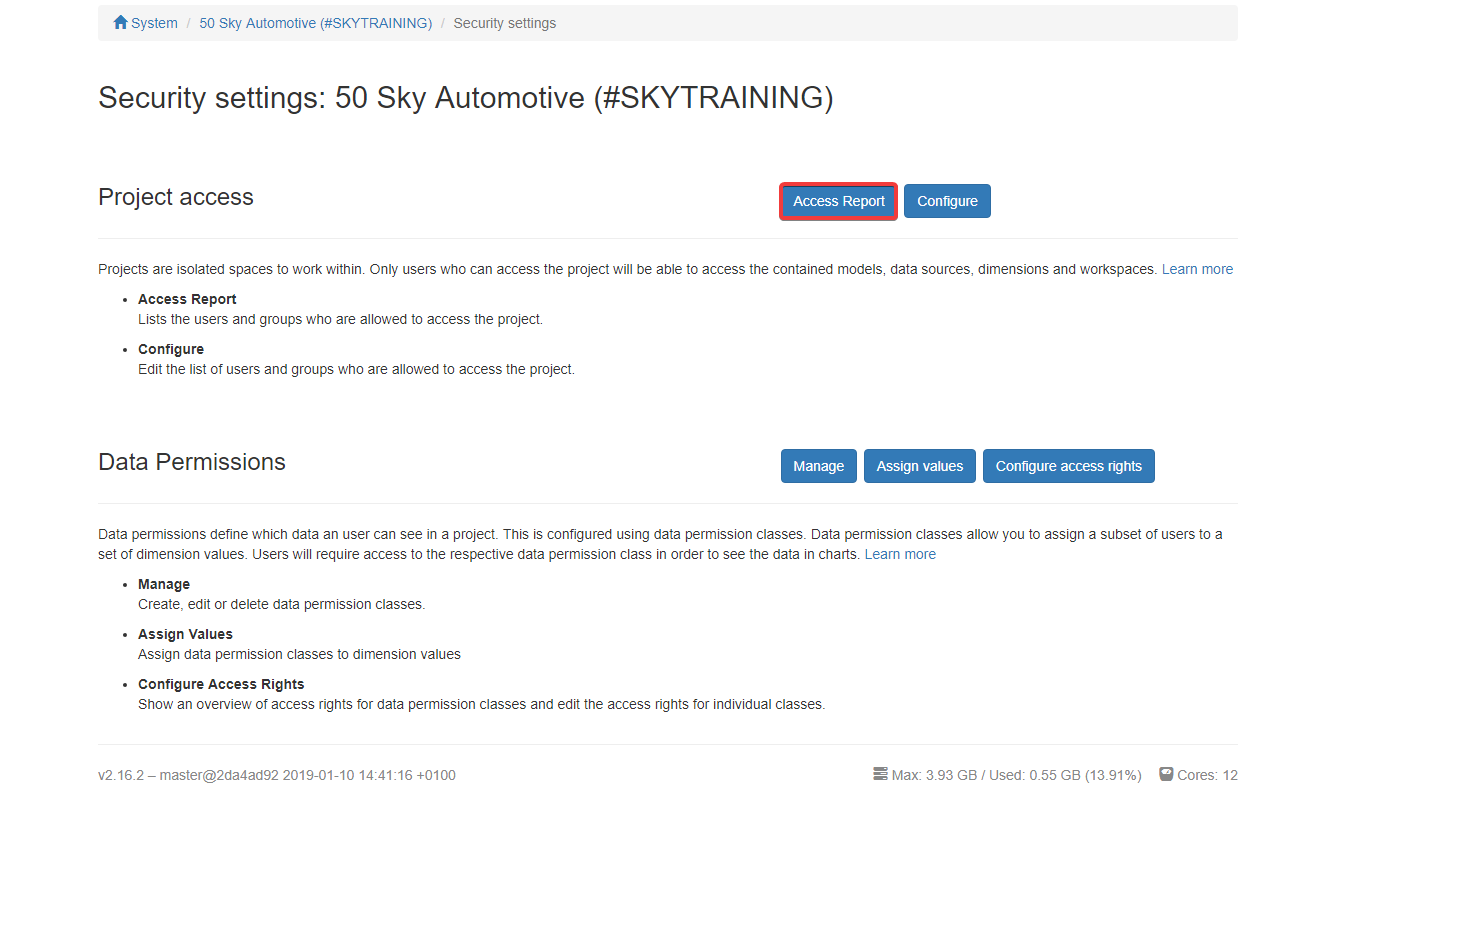
After selecting "Security" you will be forwarded to the security settings page. Select "Access Report" next to “Project Access” to get an overview of the users and their access to the project.
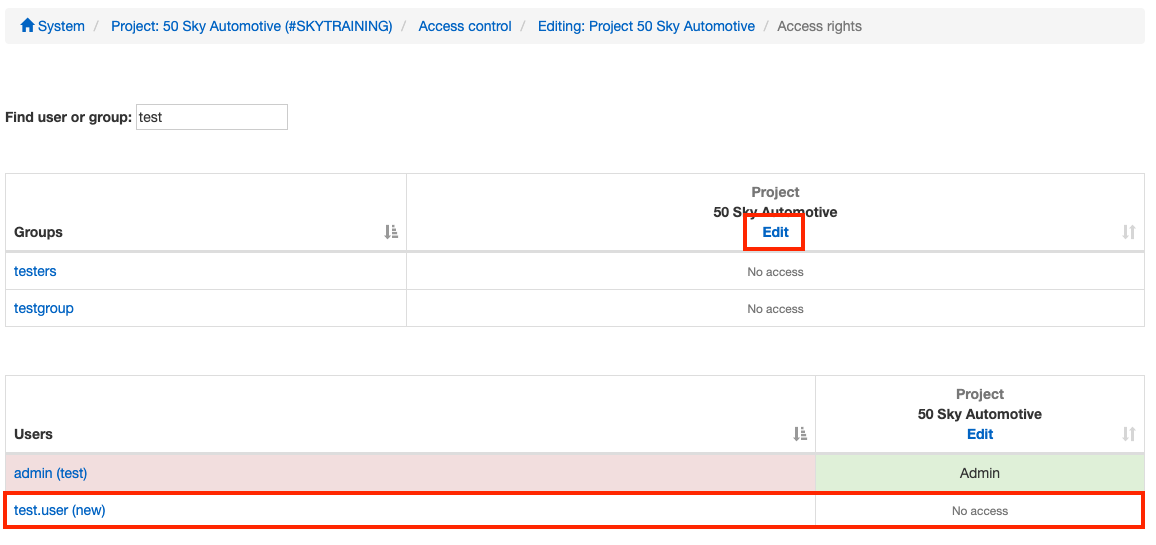
Click "Edit" to change the permissions for the project.
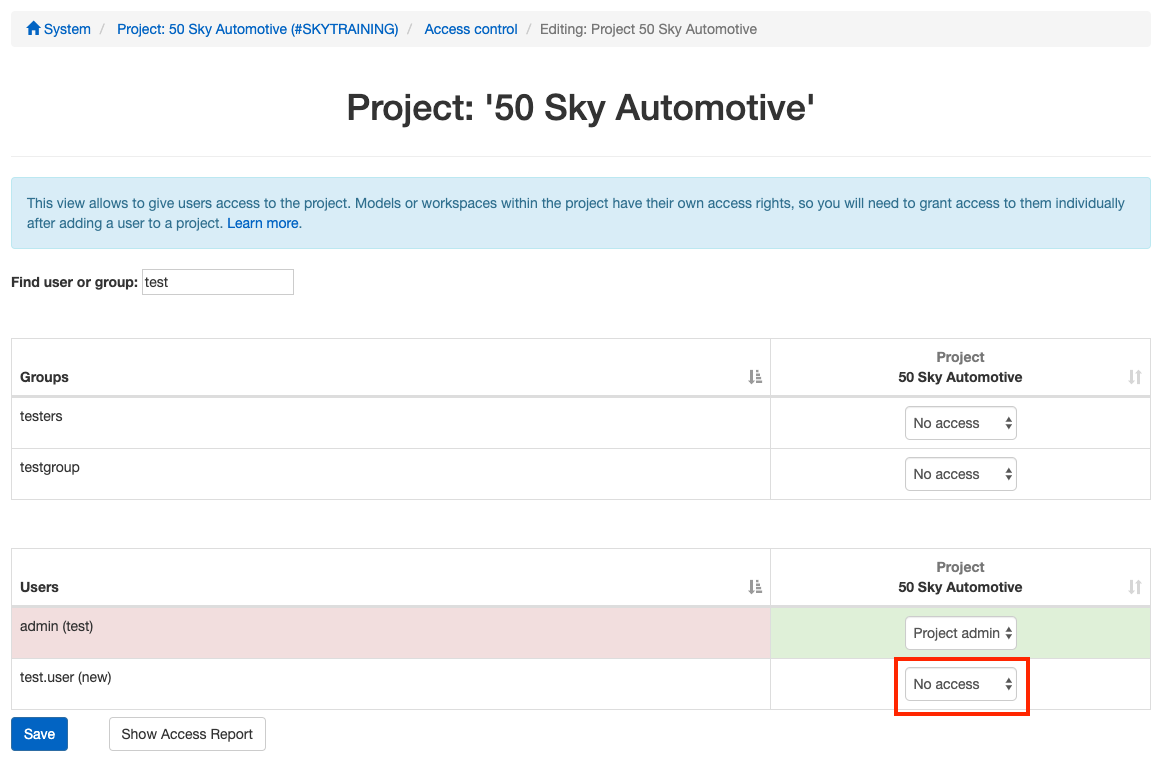
To work within a project our user needs at least "Can use" permissions on the project. Give the user the appropriate permissions and save the changes.
Now you have become acquainted with one way to edit permissions on a project ("Configuration" > "Security" > "Access Report"). But there is another one ("Configuration" > "Access control") which also lets you also change permissions on workspaces and models.
Grant Permissions for specific Models or Workspaces
In order to change models and use the workspaces, our user needs to be granted permission for these as well. To do so navigate to "Configuration" → "Access rights". Select the project containing the model and workspace from the dropdown. Then tick "models" and "workspaces" and click "Show". You will see an overview of all models and workspaces in the selected project.
Select "Edit" on the model and grant the user "Can edit" permissions on the model. Do the same with the workspace and grant the user "Full Access" permissions. You can find a detailed explanation of the different access rights on the documentation page about Access Rights.
Getting a transparent Overview over User Type Restrictions
Ability: The feature of two added rows in the 'Rights explanation' gives you the ability to easily check the user type restrictions for every single user of all projects.
Example: you need a quick and transparent overview of the access rights of a certain user for specific projects
Step 1:
Open the access control page via setting > access rights and check all information you need to see
Step 2:
When hovering over a cell of a user and a project you need the information on, your cursor will display a small ‘?’ next to it. To access the overview, click on a cell.
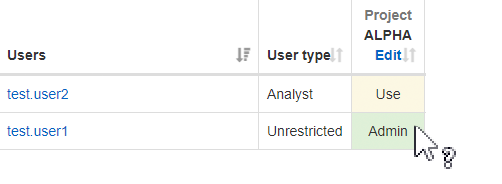
Step 3:
After clicking on it, a pop-up window opens. The added feature relates to the upper two rows (see picture).
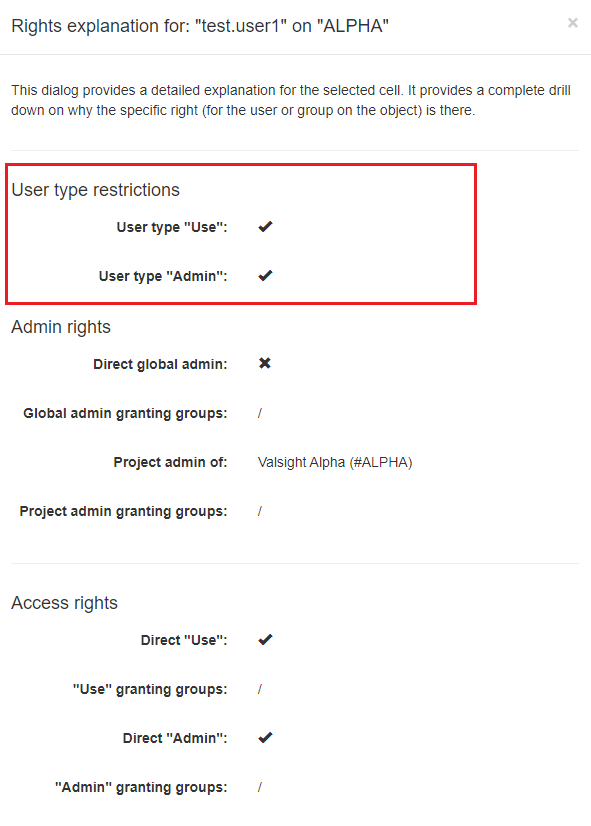
In this case, you checked the access rights of an unrestricted user type (test.user1) with admin rights in the project ALPHA.
That user has an enabled user type “Use” and an enabled user type “Admin”.
In another case, you need to check the access rights of for example an Analyst (test.user2) in project ALPHA.
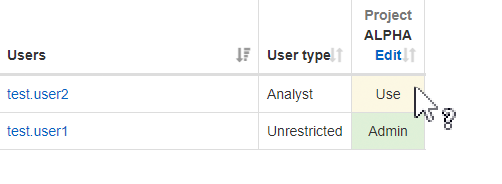
After clicking on the cell for that user and the related project the pop-up window opens.
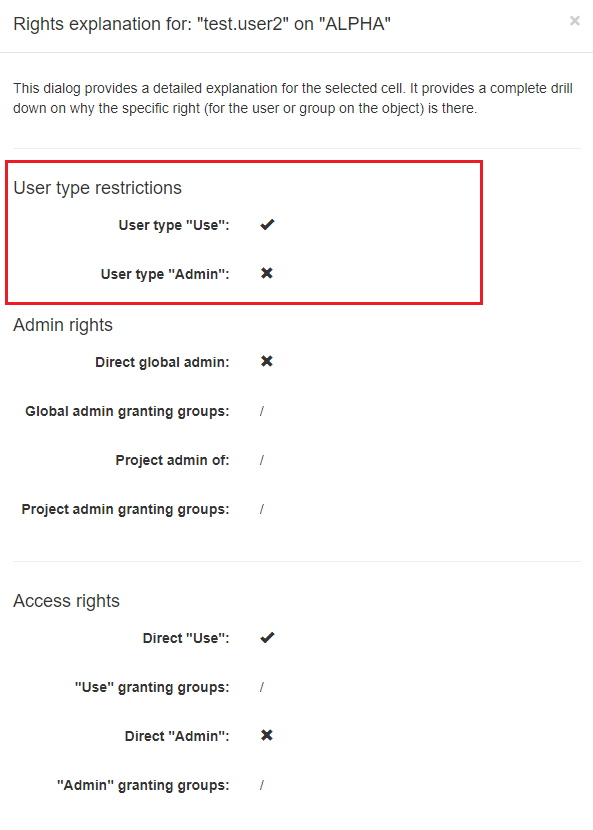
You now see that the analyst has an enabled user type “Use” but is not listed as a user type “Admin”.
