Validations
Learn what “validation” means, what it does and how to do it.
Basic Overview
Valsight offers a validation function at multiple places in its interface
Validating components ensures that they are compatible, properly formatted, and working as intended
You can validate data, Workspaces, or Dimensions
Purpose of Validations
Valsight works with a multitude of complex data formats and has many moving parts. To ensure that data and software are running smoothly and working as expected, you can employ the use of the validation function.
The validation function automatically verifies the compatibility of data, Scenarios, or Dimensions and checks if any unexpected errors or behaviors occur. It will also inform you of the whereabouts of potential issues if they are found during validation.
Where to Find Validations
Base Data and Dimensions
Although these are technically two different parts of Valsight, they both offer the same validation of uploaded base data.
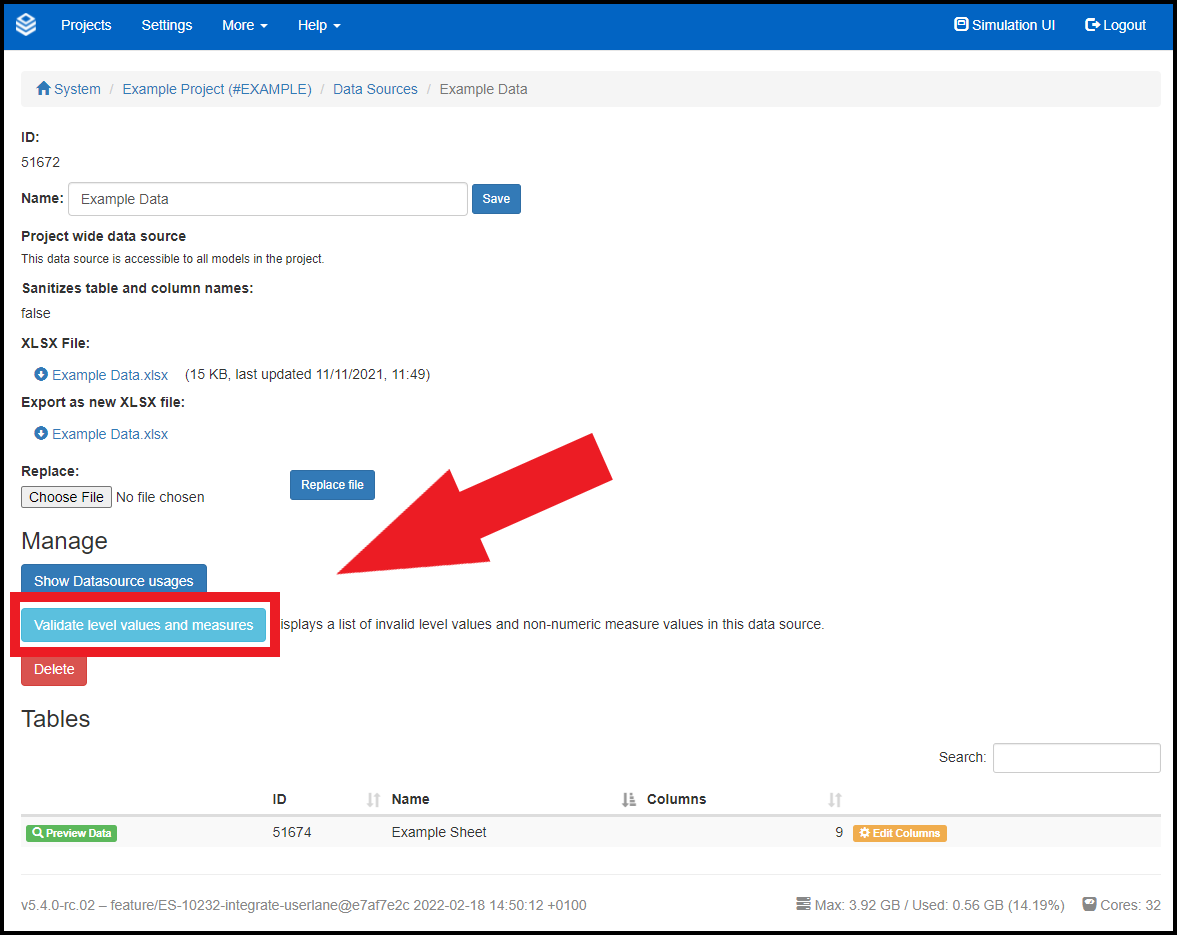
By validating uploaded data you can ensure that they are correctly formatted, contain no wrong values, and comply with your defined Dimensions. If deviations are found, the validation tool will inform you about the kind of error and where to find it, allowing you to easily fix problems in your base data.
To validate your base data and check their compliance with defined Dimensions, click the “Validate Level Values and Measures” button on the files' Data Source page.
Changing or Deleting Data Sources
When renaming or deleting a data source, Valsight will automatically validate its impact on existing nodes. If the change risks invalidating any nodes, a detailed list of affected nodes will be displayed for review.
To proceed confidently, review the list and confirm the changes. If the invalidations are acceptable, finalize the action by clicking "Rename" or "Delete."

Models
The modeling page also offers the validation of your created models. By using the model pages' validation function, you can quickly examine, whether your base data and model are compatible and follow the correct syntax for Node contents.
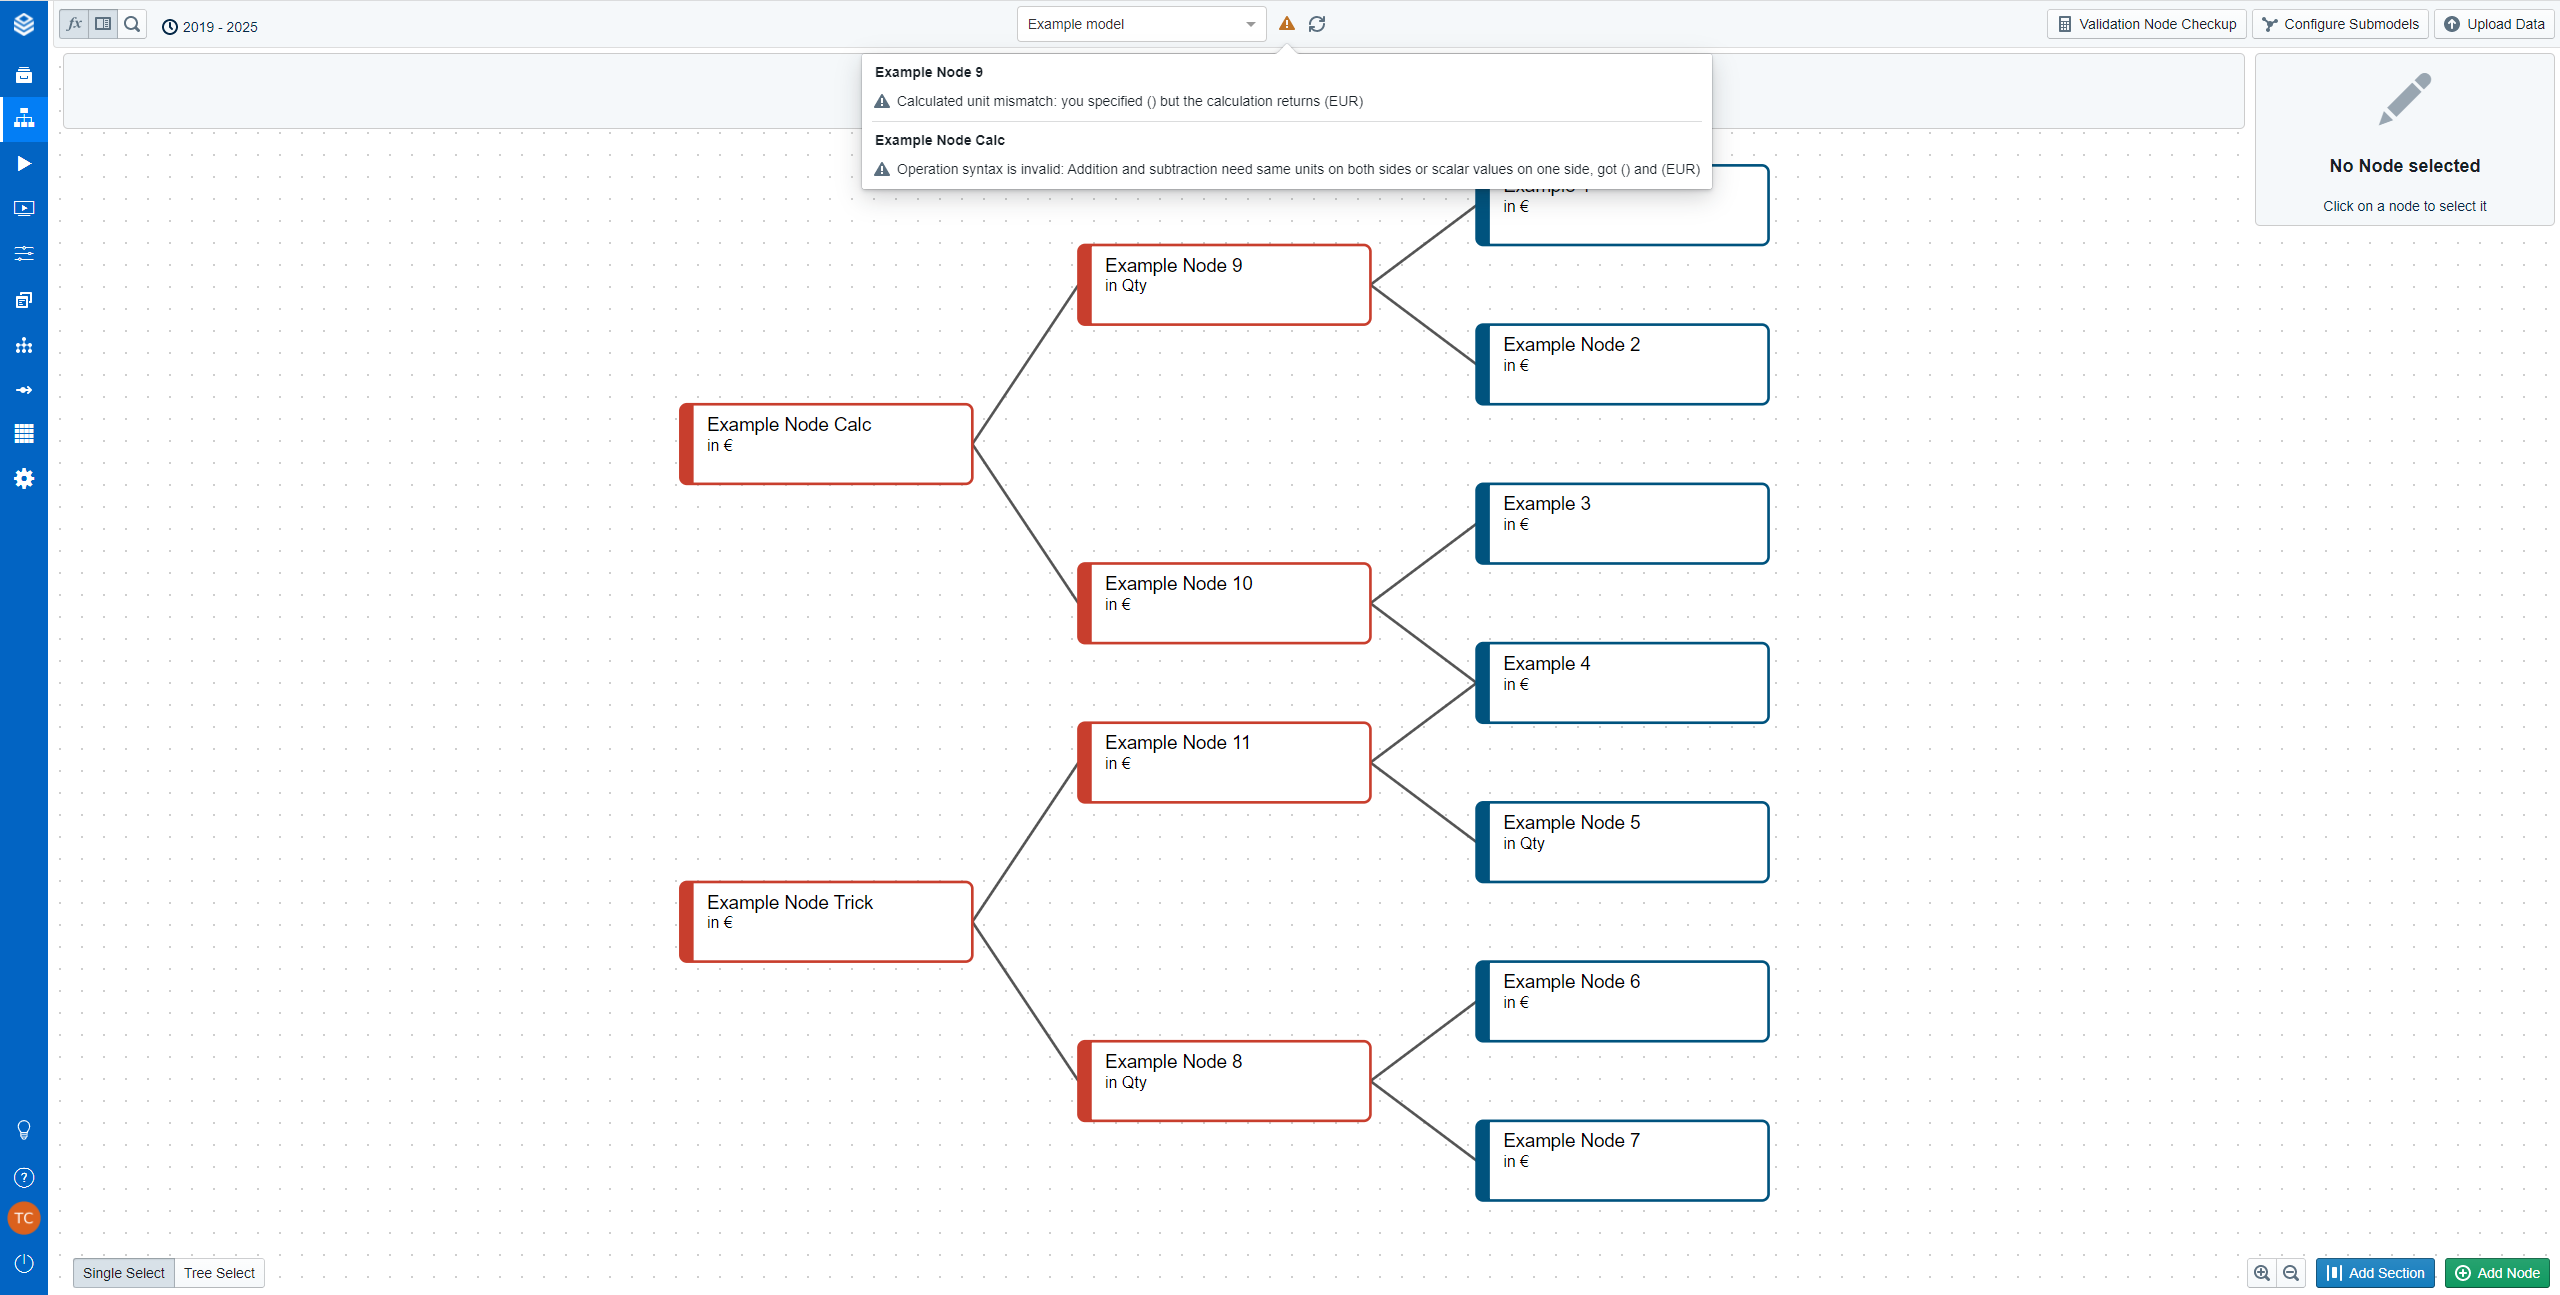
If Valsight detects errors in your base data or model, the validation status will name you the relevant line in your base data or the specific Node(s) containing the error(s). This way, you can quickly find and fix potential issues in your data and model.
To verify your base data and model, click the validation button at the top of the modeling page. The icon left of the validation button will then show you the status of your validation and, if issues were found, will tell you where these issues are located.
The validation icon has three possible states to inform you of the status of your model and base data.
Symbol | Status | Explanation |
|---|---|---|
 | The model is valid. | The model, its syntax and all connected base data are working properly and without issues. |
 | The model is invalid. | Either the model or the connected base data are not fully functioning. Click the icon to obtain detailed information on the invalid components. |
 | Your validation is out of date. | You have made changes to your model, that have not yet been validated. (Note: This message will only appear if you have set your validation function to “manual”.) |
Workspaces
Workspace Validation
Yet another section that offers the use of the validation function are Workspaces and, consequently, the Scenario Manager.
The Workspace validation acts as a more specific test for otherwise undetectable errors in your model and its logic and validates the proper function of your model’s validation Nodes.
Workspace validation can also be adjusted to be performed automatically, removing the need for manual validation.
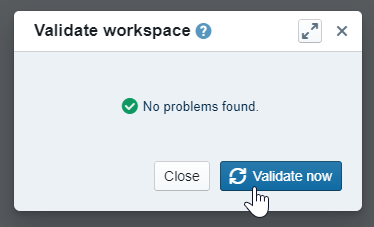
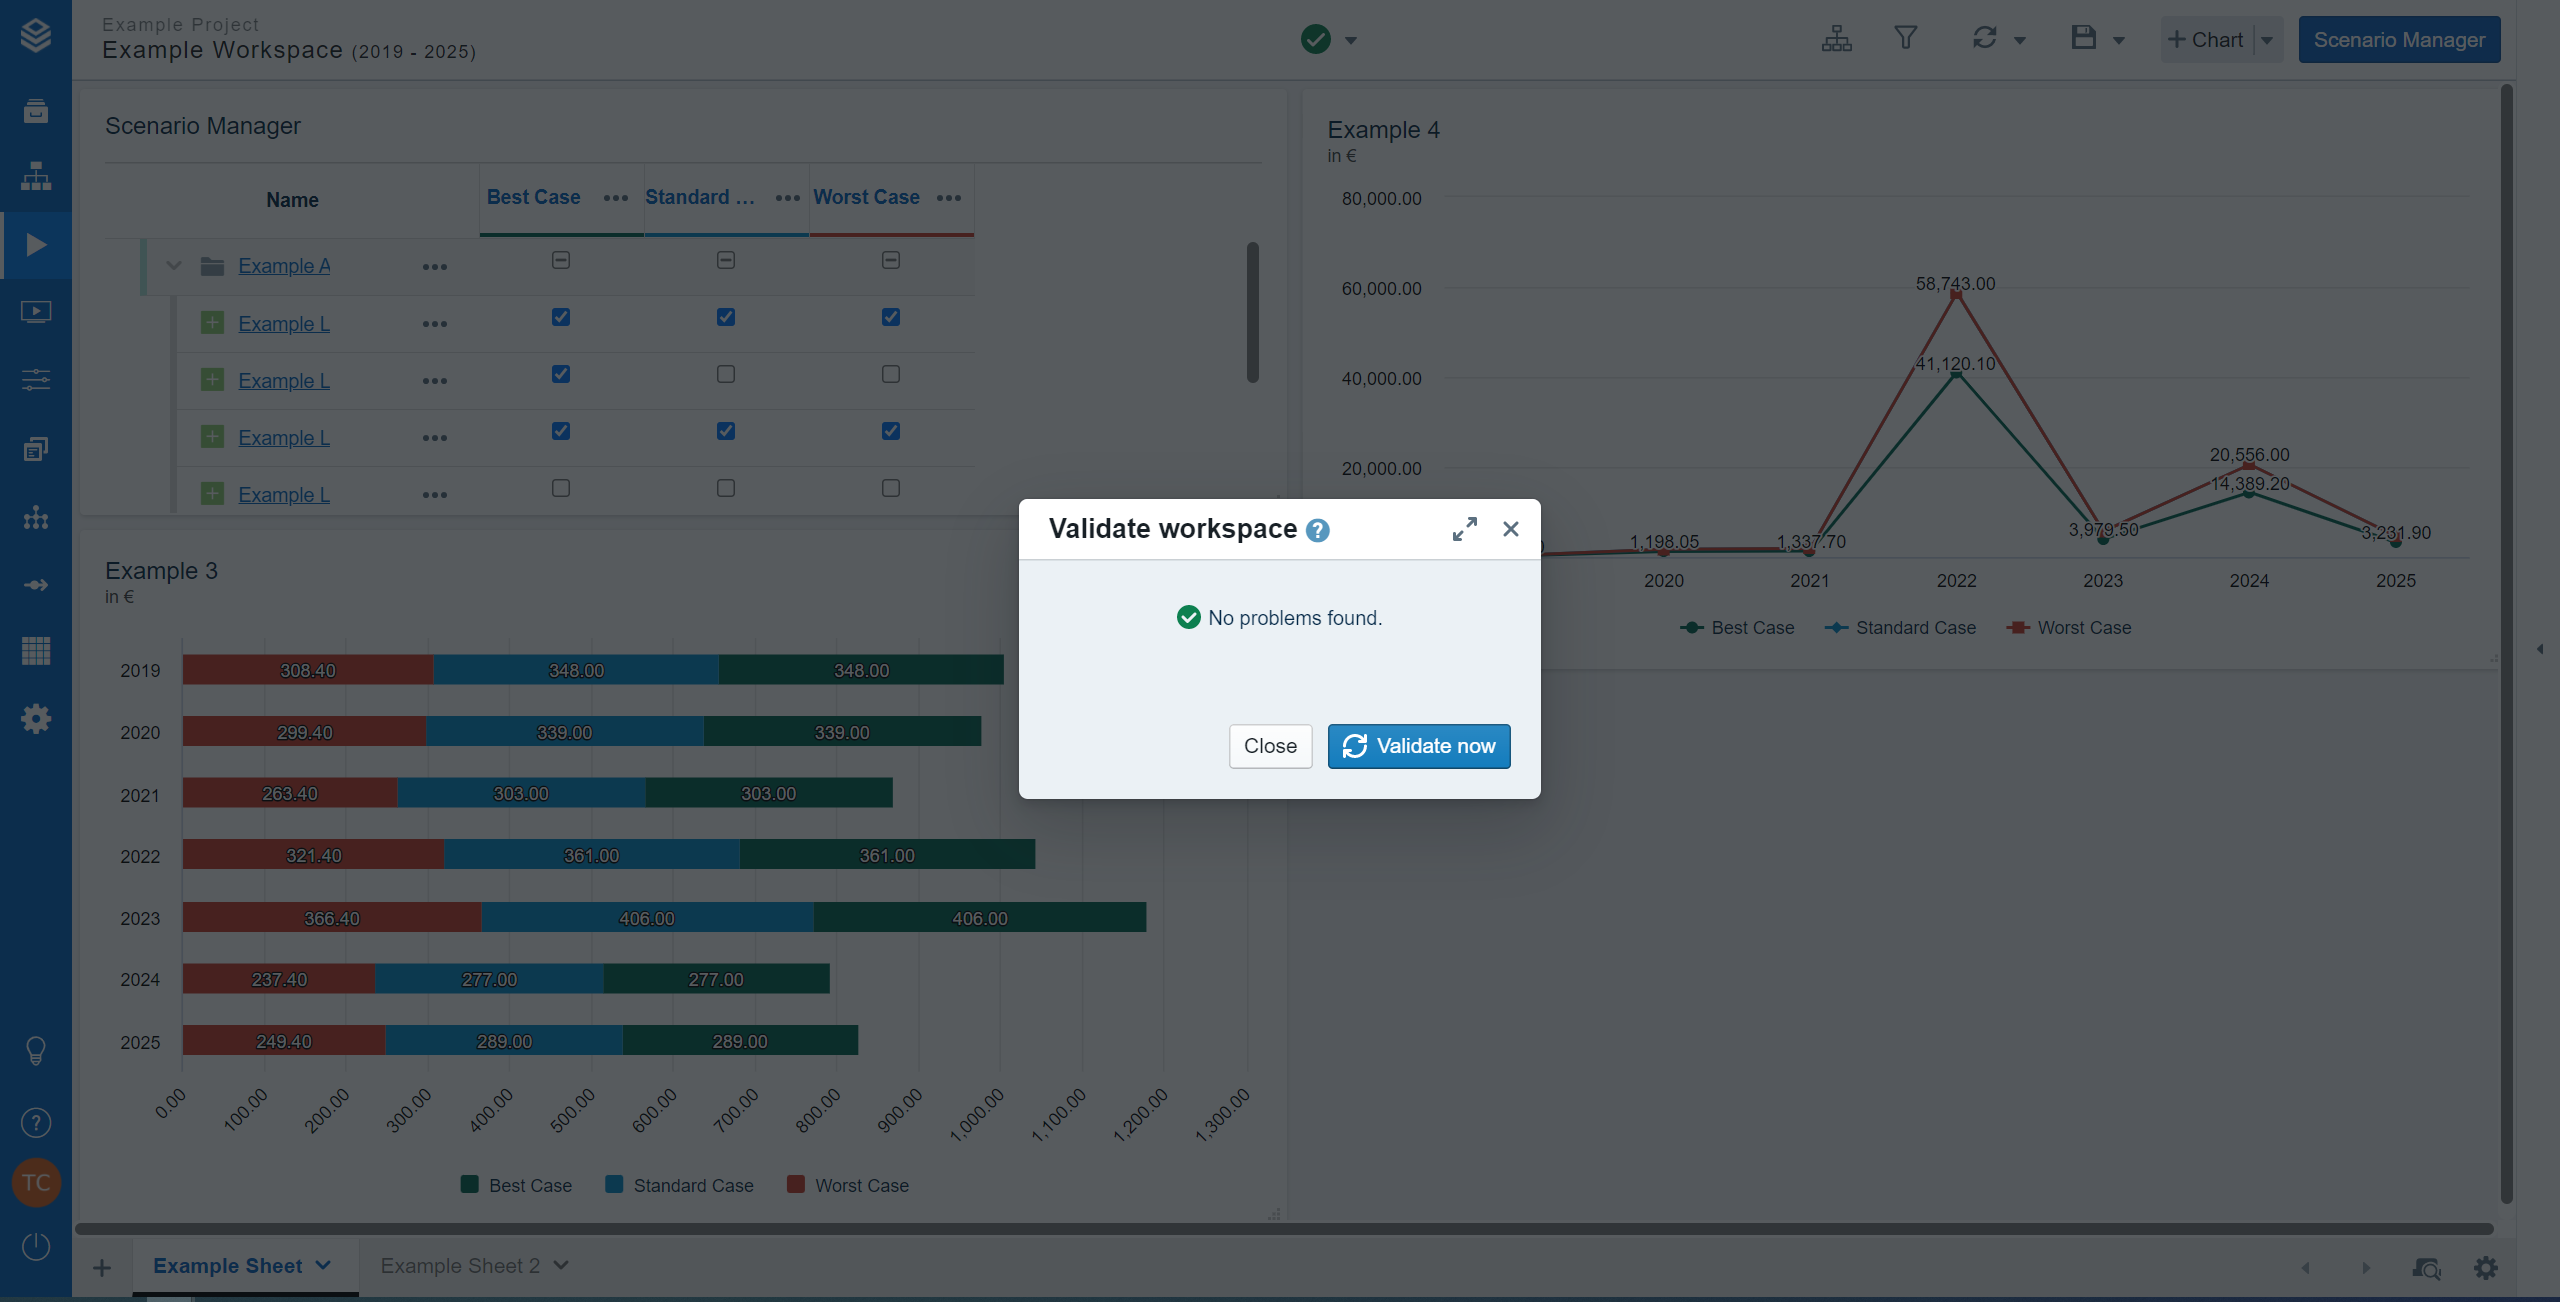
Either way of validating will yield the same results as the model validation; if successful, a green tick will appear; if errors are found, a warning symbol will appear which can be clicked to get additional information on the whereabouts and nature of the error.
Symbol | Status | Explanation |
|---|---|---|
| The workspace is valid. | The workspace, its charts and all scenarios are working properly and without issues. |
| The workspace is invalid. | Either the wokspace or its components are invalid. Click the icon to obtain detailed information on the invalid components. |
| Your workspace is out of date. | You have made changes to your workspace or scenario manager, that have not yet been validated. (Note: This message will only appear if you have set your validation function to “manual”.) |
Validation Nodes
Validation nodes are a special kind of node with the sole purpose of validating your model nodes. They can be added to a model like any other node by selecting them from the “Add Node” menu.
Validation nodes are used mostly when your model contains nodes with formulas, which would not be caught by the model validation if defective. By using validation nodes, you can implement specific conditions which need to be fulfilled for a successful validation, adding an additional method to avoid potential errors.
Example:
Validation nodes are most useful when your formula tends to have errors that do not lead to errors in the model validation.
Let's say we want to check for our value of the node 'Volume' to be always positive; while negative values might obviously be wrong (for example when calculating the number of sold units), the validation function would not catch a negative result as an error.
We add a validation node 'PositiveVolume':
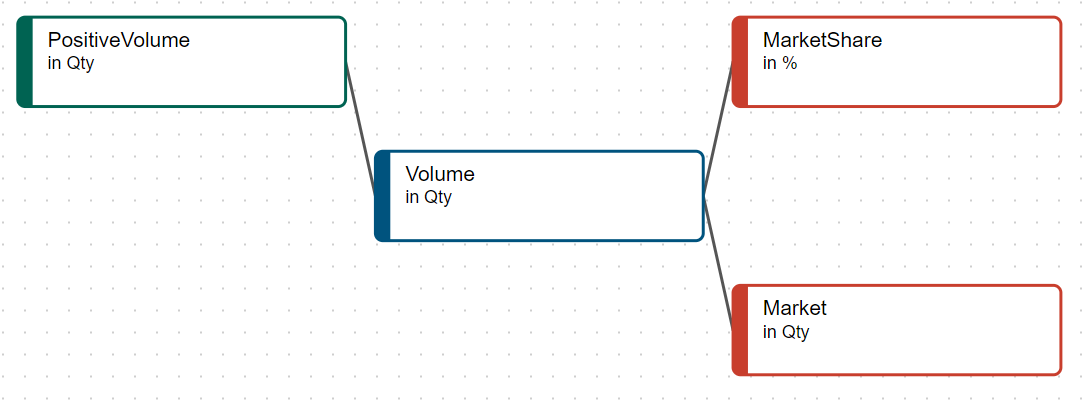
To get a positive validation for positive values, using the IF formula, we add the following formula. Other common commands here are MIN and MAX.
Node | Formula | Explanation |
|---|---|---|
PositiveVolume | IF('Volume'>=0, 0, 'Volume') | If the volume returned is above or equal to 0, a 0 is inserted and no errors are shown. If the volume is below 0, an error is shown. Value > 0 = validation error |
PositiveVolume | MIN(0,'Volume') |
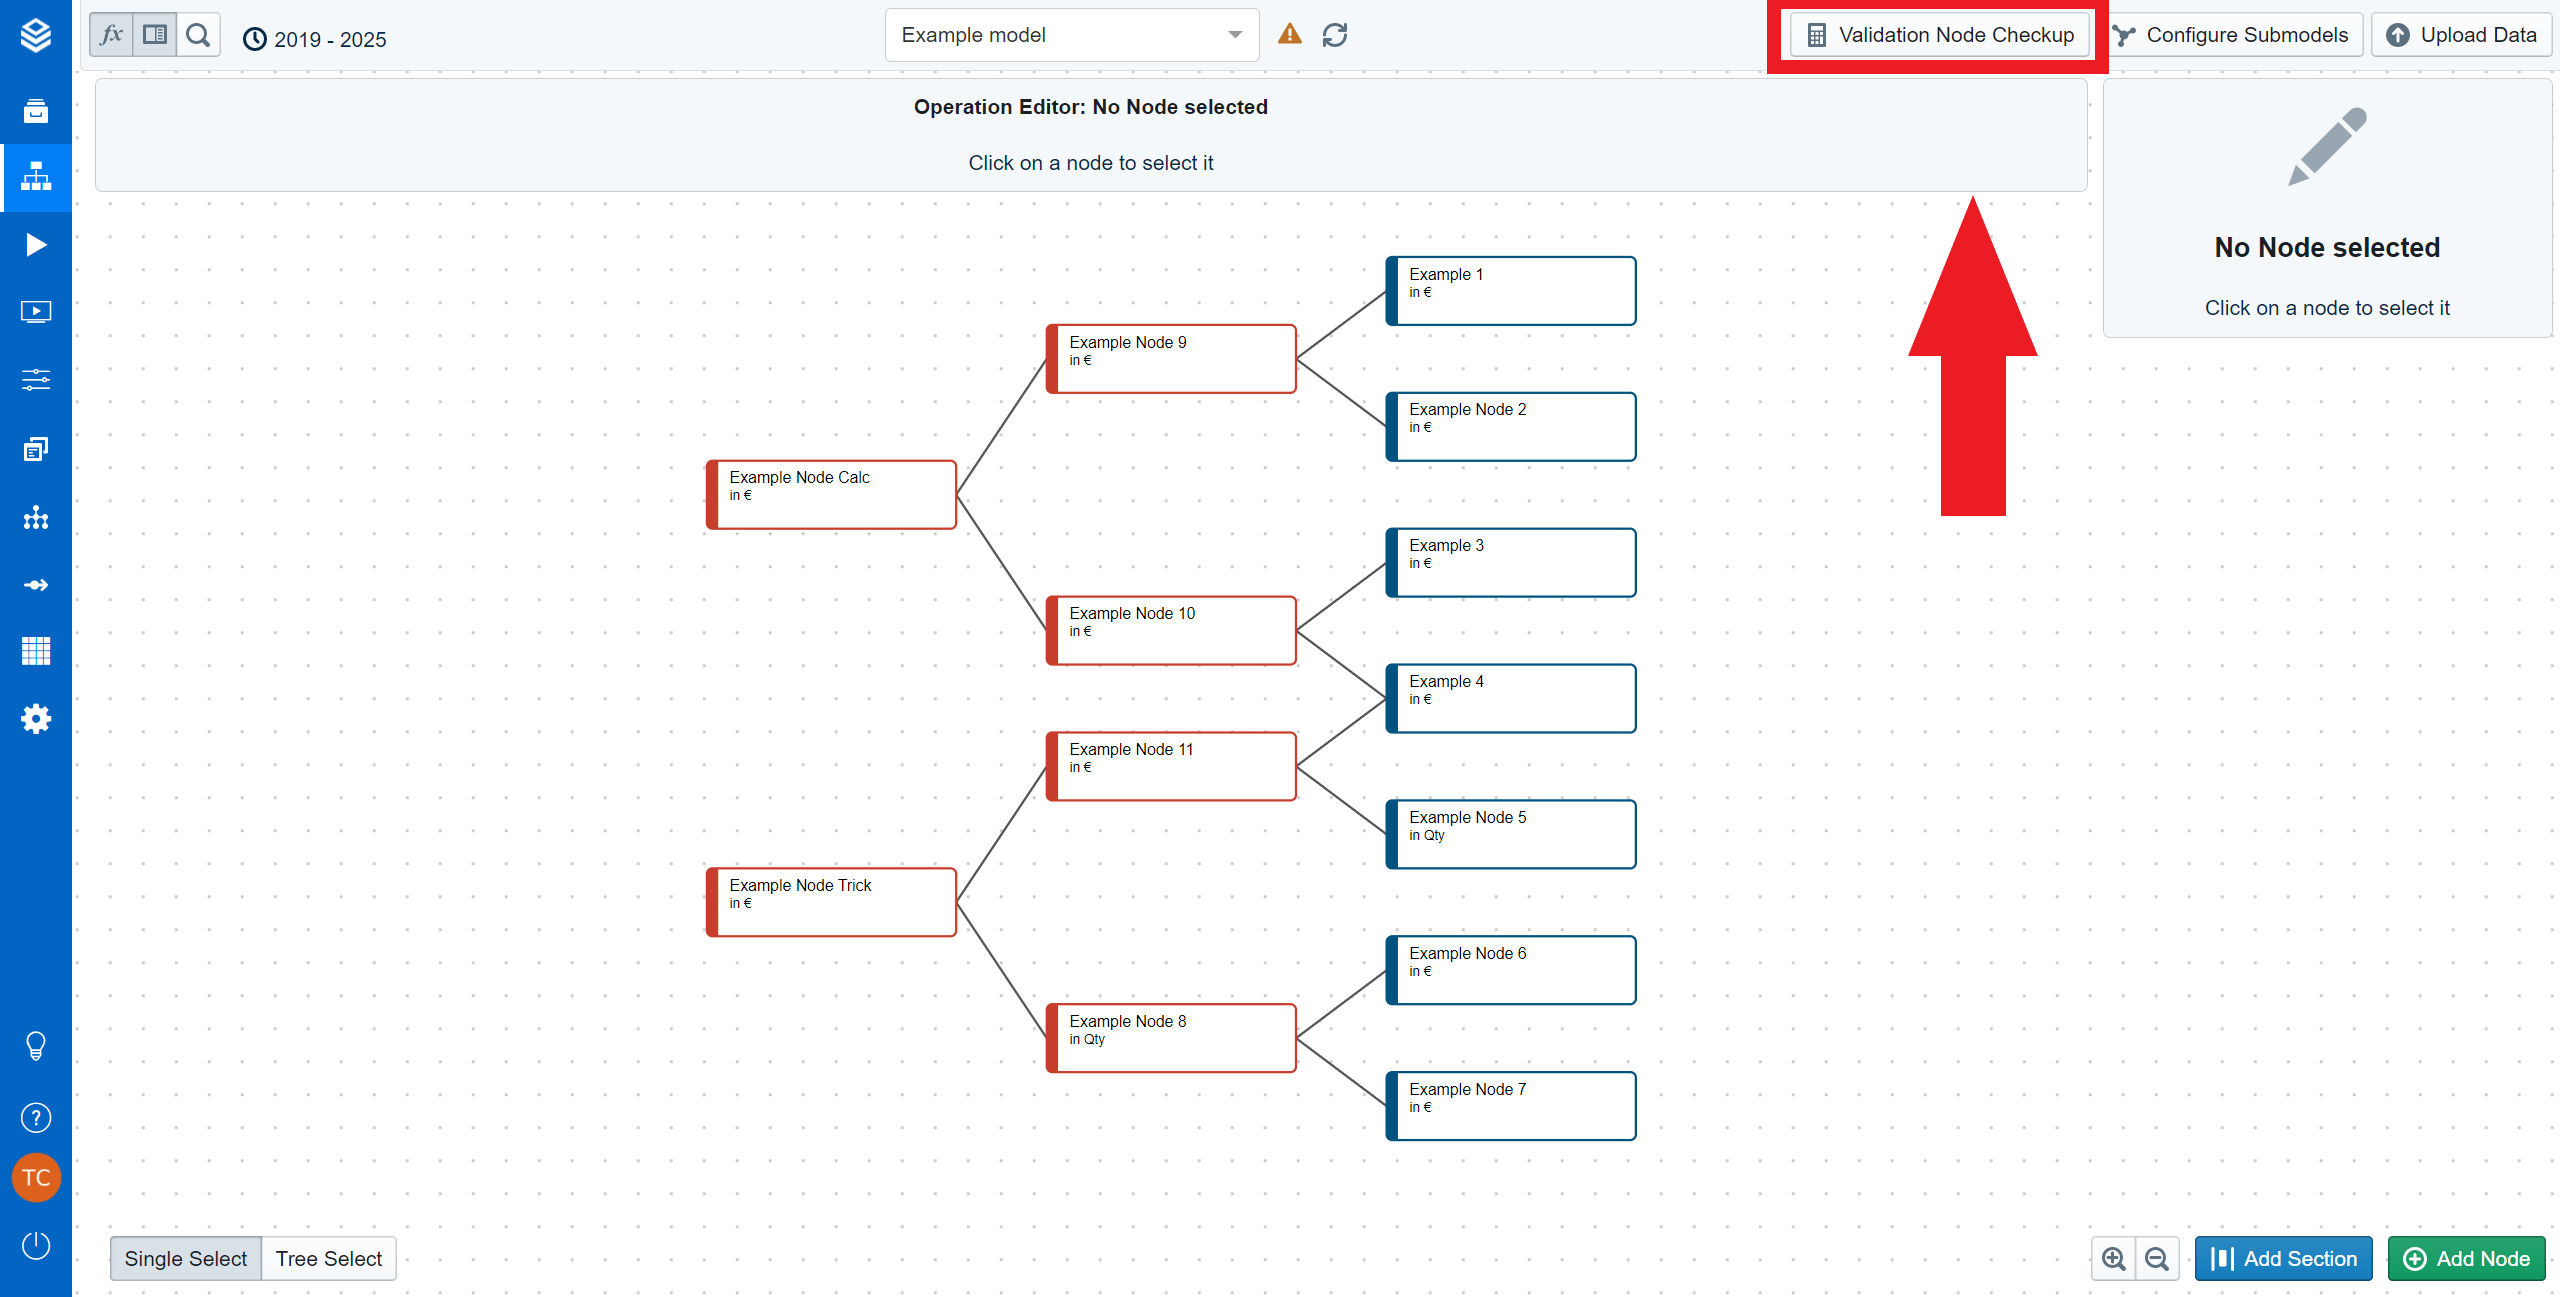
To validate the function of validation Nodes, you need to click the ‘Validation Node Checkup’ button located in the top bar.
If you previously created validation nodes to check for specific conditions in your calculation results, you can now use the validation tool to find out if everything works in order.