
Working with Dimensions
Basic Overview
The data we used in the tutorial only uses the built-in time dimension. We will now show you how to create other custom dimensions and how to use data with them.
Following the rules outlined in Dimensions & Hierarchy Management, we navigate to the Dimension Manager and create a new Dimension.
Creating a Dimension
To fill a dimension with values, there are two possible solutions: Creating the dimensions manually from the dimension manager or uploading an XLSX sheet to let Valsight automatically create them.
Create Dimensions manually from Dimension Manager
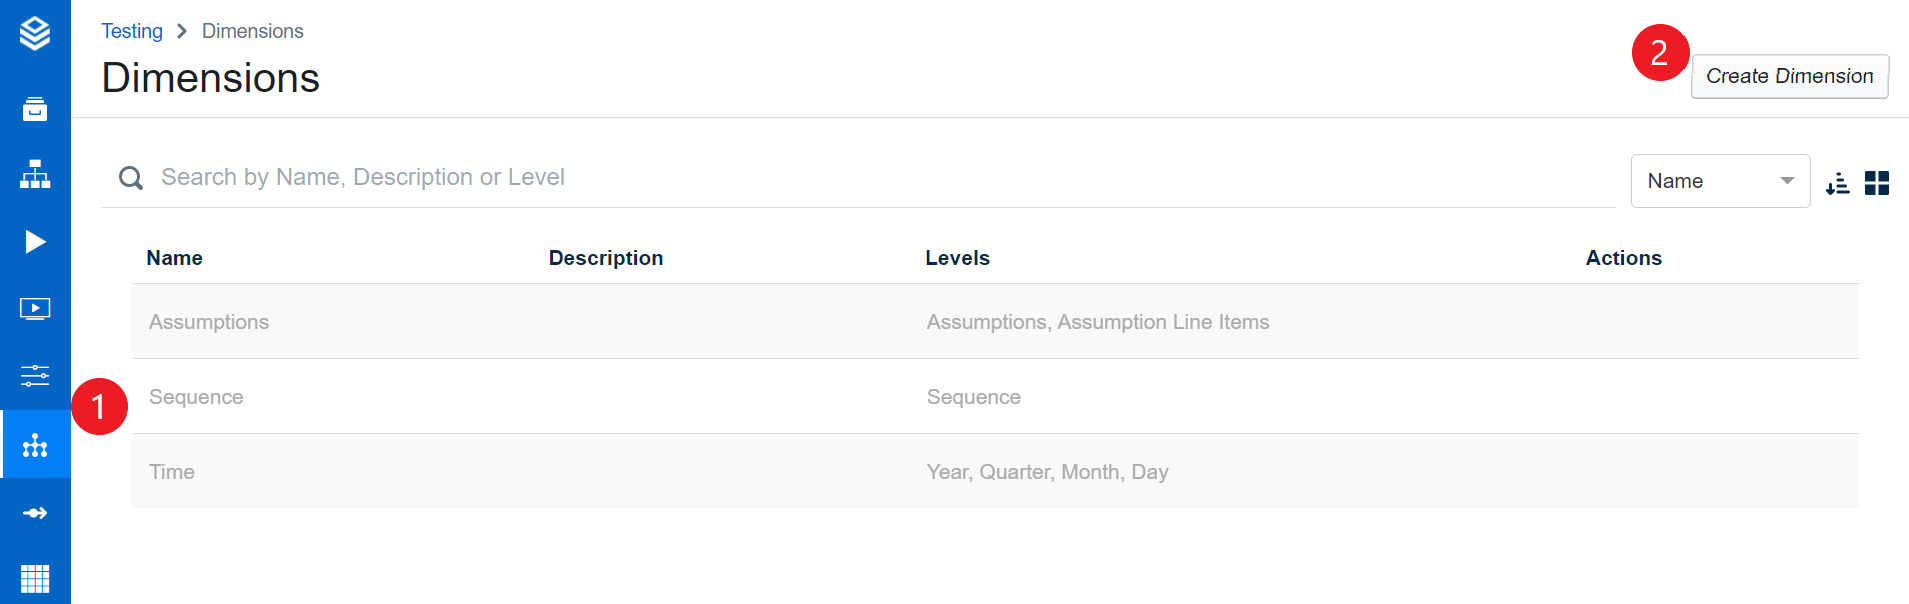
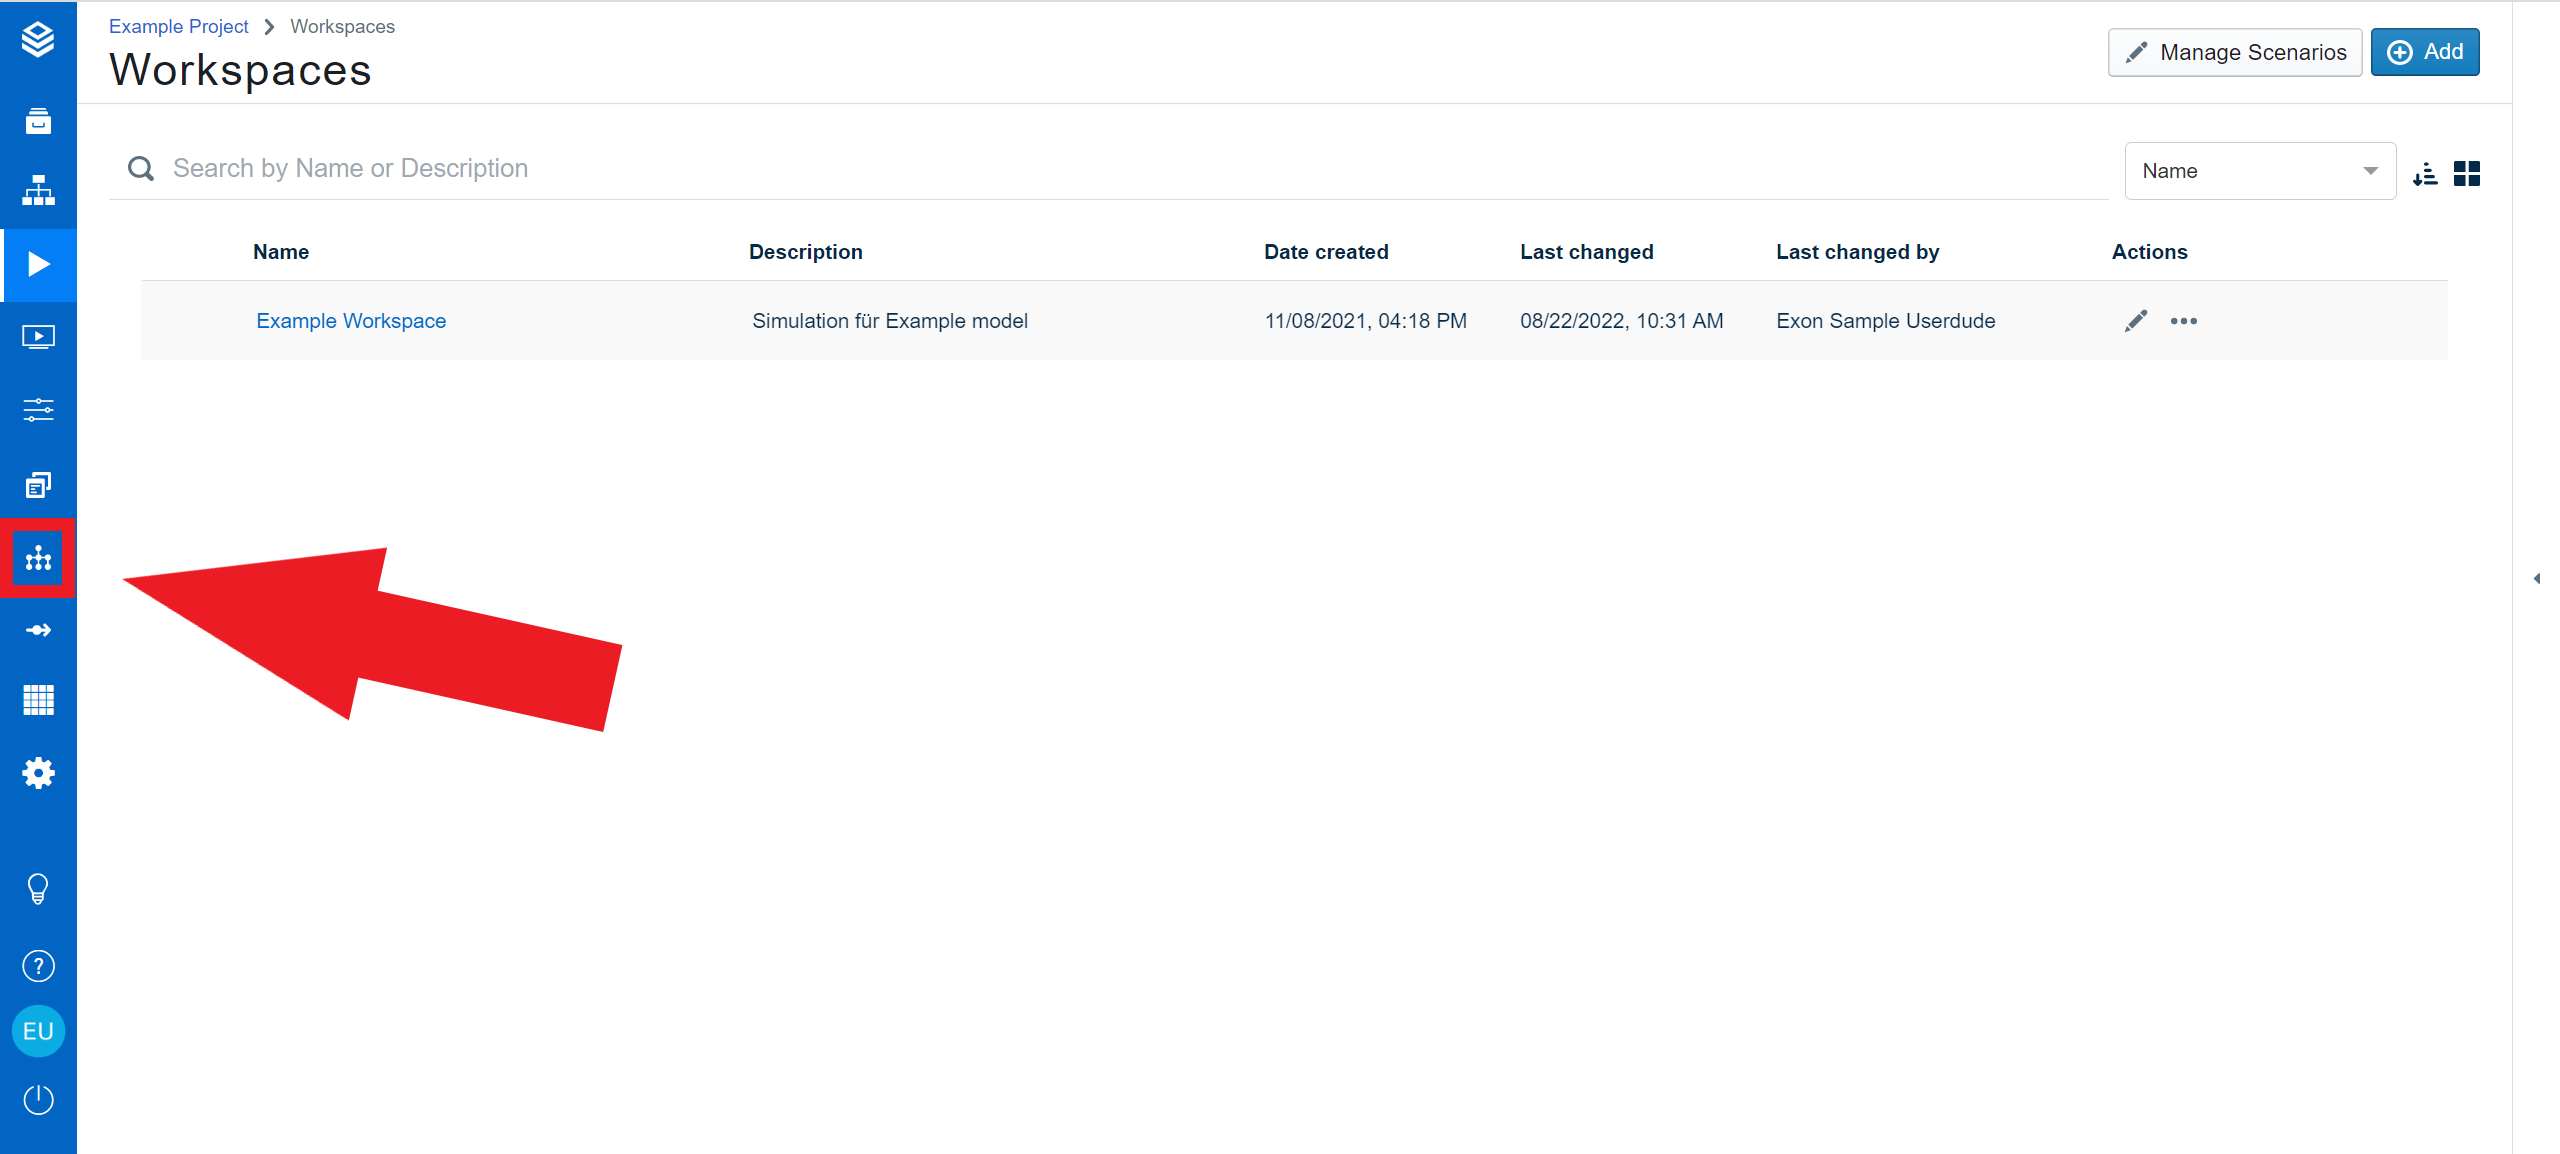
To create a dimension manually, head to the dimension manager via the navigation bar.
Here you will see an overview of all your existing dimensions. To create a new one, click the “Add” button in the top right corner. A pop-up window will open that enables you to enter a dimension name and description, and already add multiple levels to your dimension.
In this example, the dimension shall be named 'Location' and consist of three levels: “Continent”, “Country”, and “City”.
After entering the first level, press 'Shift + Enter', and the entry field for the next level will appear.
Adding Level Values
The next screen after you confirmed the dimension name and its initial levels shows you that you have not yet entered any values for those levels.
Therefore, the next step will be to fill the three first levels with content.
Click on the 'Add entry' button in the upper left corner. A drop-down menu will open.
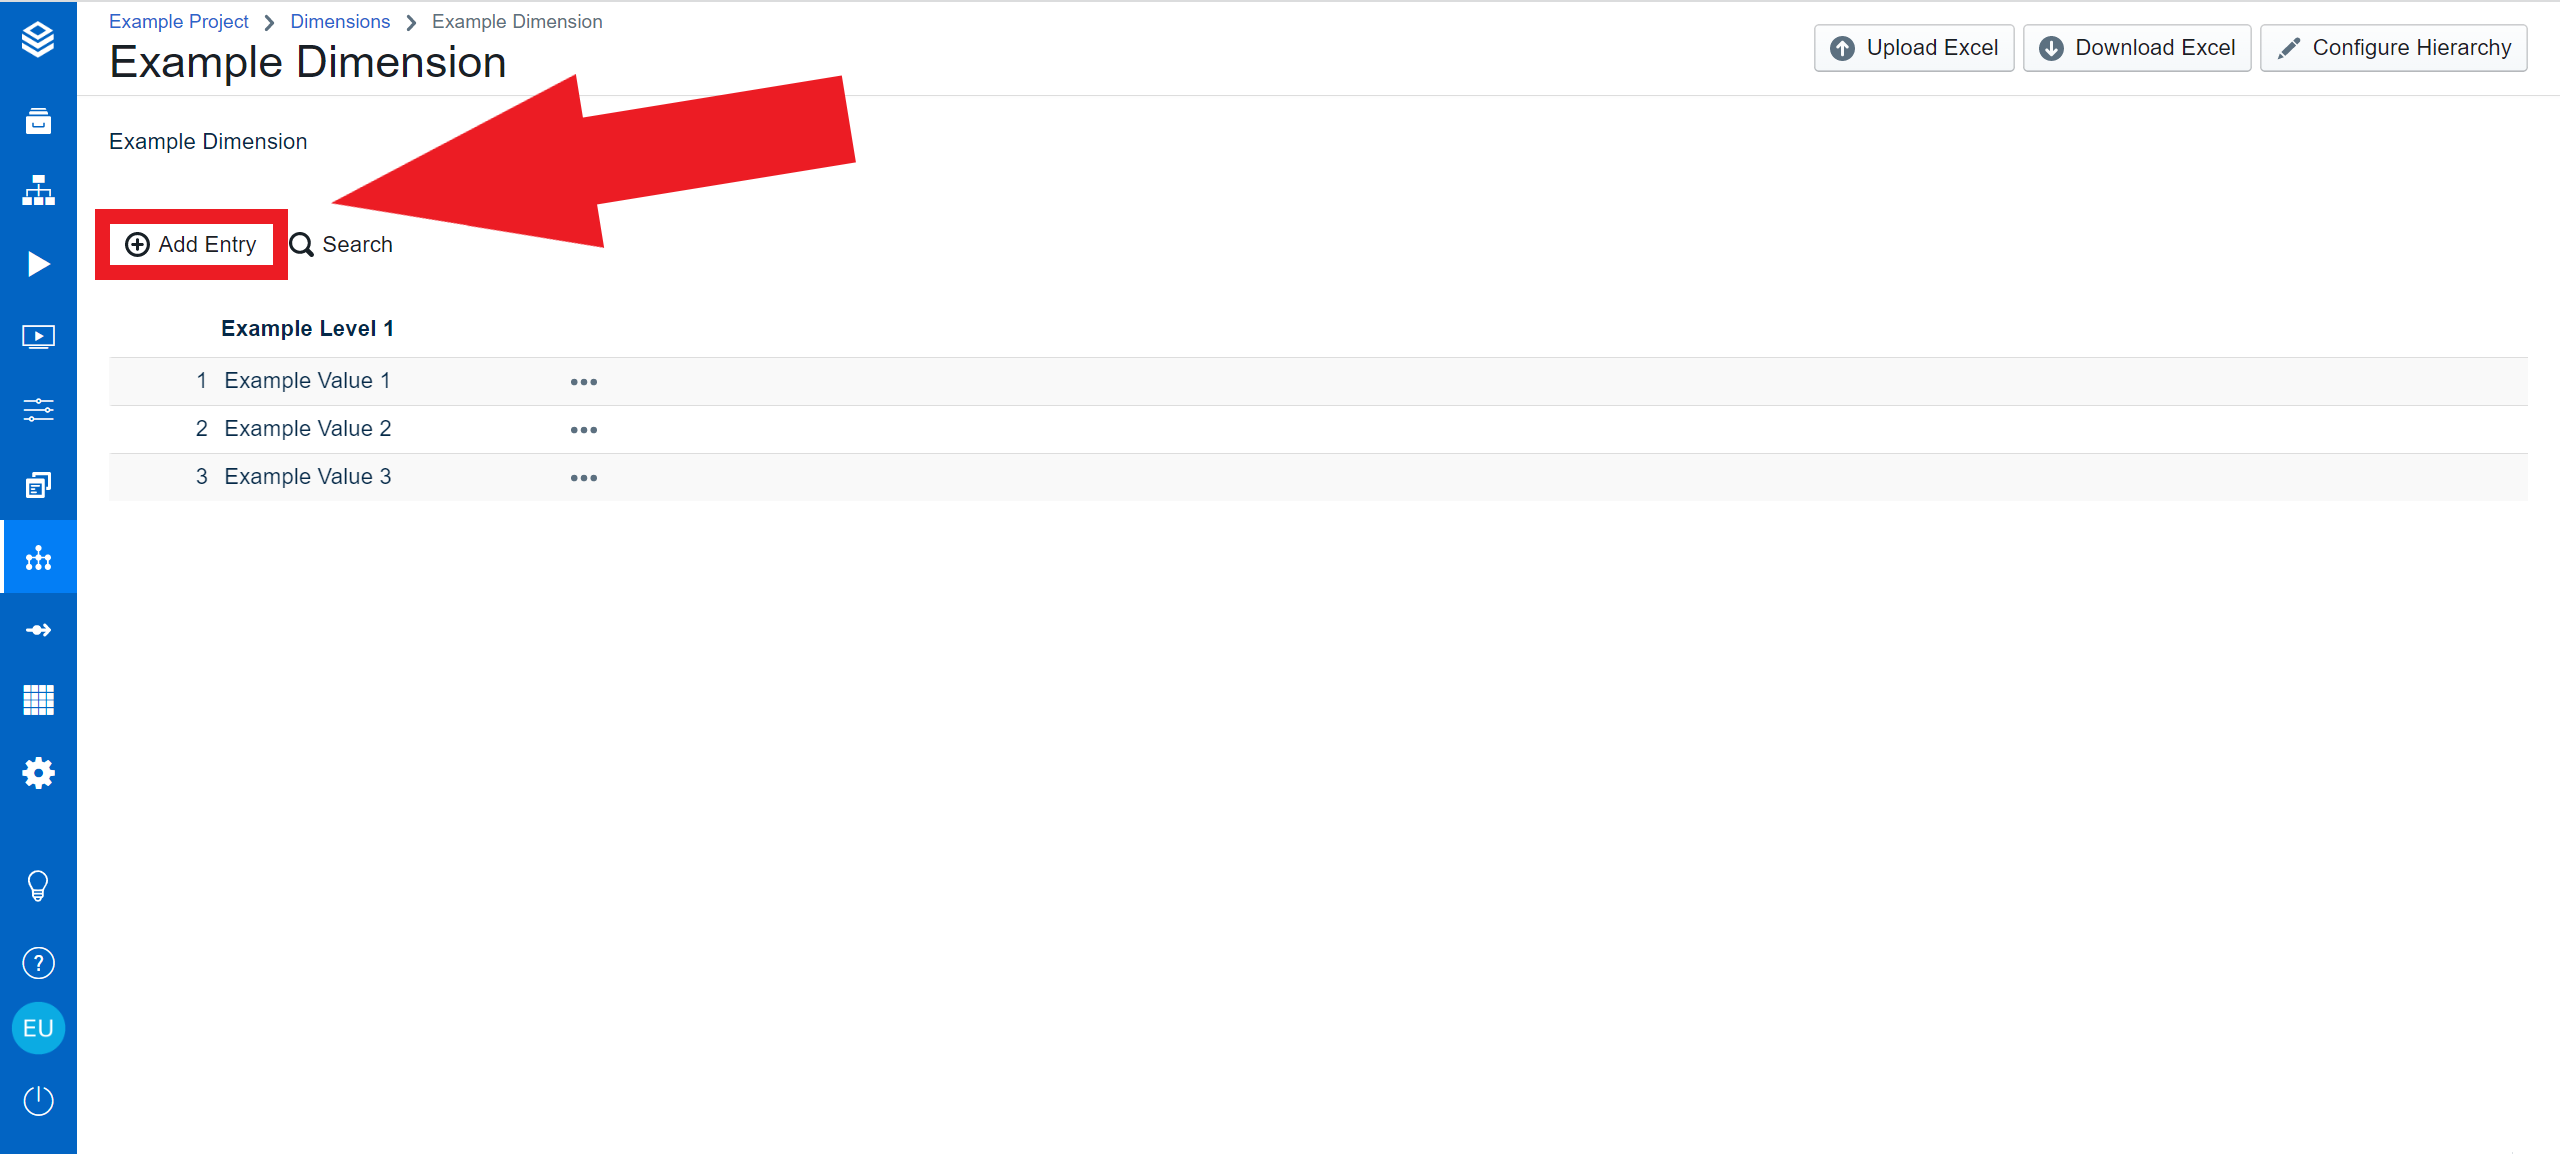
Enter the name of the first level entry you want to add and click on 'Create value....'
Do the same for the second and third levels (for the third level you do not need to click on 'Create value....')
Click “Add” and the values will be added
Create new values
To create new values for each level you need to enter the name of the value you want to enter and click on 'Create value....' or press enter. This is not necessary for the last level.
Adding Rows to Levels
Users are also able to add rows to the levels without uploading a new excel file.
Rows can be added with the 'add entry' button.
This process is also possible with linked levels.
Adding new Level Values
To add a new level value, download the Excel file from the dimension page and add a new row with all of its levels.
In this example, we add the city 'Peking' on the continent 'Asia' (Here in green). On upload, a prompt shows which new values will be added.


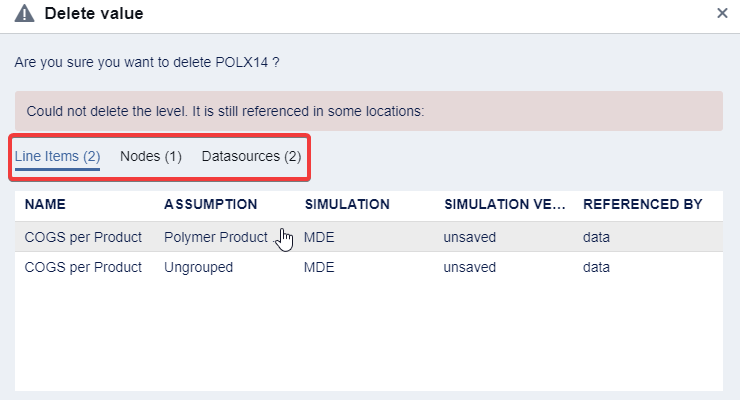
Deleting a Level Value
Deleting is only possible if the level value is not referenced in any line item or node and is not included in any data source as shown in the example below. The deletion prompt shows all items you need to adjust beforehand.
Understanding Usage of Dimensions in a Project
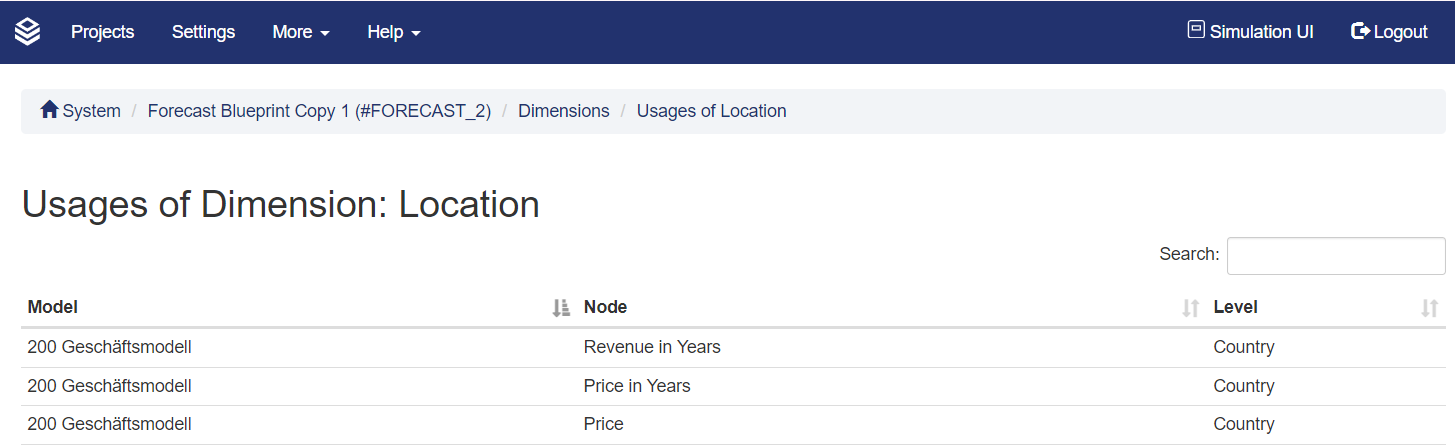
As a project admin, a user is able to trace in which model and in which nodes a dimension and its levels are used.
To do so, go to the Valsight settings, via the settings icon in the tabbar.
From there, navigate to your project in the project list and use the “Show Dimensions” button.
At the bottom of the details listed there, a usage report for the selected dimension can be opened. The following list shows the model, the node and the level in use.
Uploading a configured XLSX Sheet
For the second method, name the dimension "TutorialProduct" and the Level 1 "TutorialProductGroup".

After creating the Dimension we want to configure its hierarchies. Select "configure Hierarchies" in the top right to do so.

Our dimension has two hierarchies or levels. The first one is "TutorialProductGroup" which we created together with the dimension.
This dimension contains the product group each product is in. The second level is named "TutorialProduct", containing the different product names.
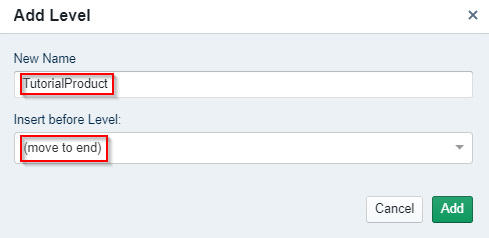
To create it select "Add Level" in the top right.
Now name the new level "TutorialProduct" and insert it in the last position, since it is our lowest ranked level.
Now that our hierarchies are set up, we can select "Download Excel" on the top right in the previous menu.
This will give us an XLSX file into which we can enter our level values.
Please transfer the following values into the new XLSX file:
TutorialProductGroup | TutorialProduct |
|---|---|
Group A | Product A |
Group B | Product B.1 |
Group B | Product B.2 |
The finished XLSX file should look like our example.

The next step is to upload the updated XLSX file. To do so, select the "Upload Excel" button next to "Download Excel".
Then select the "TutorialProduct.xlsx" file, click on "Preview" and lastly on "Confirm".
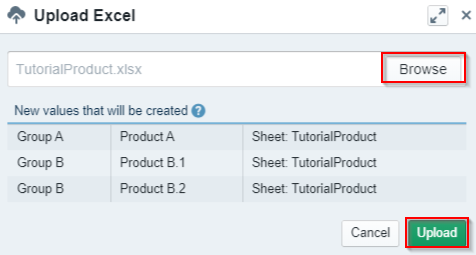
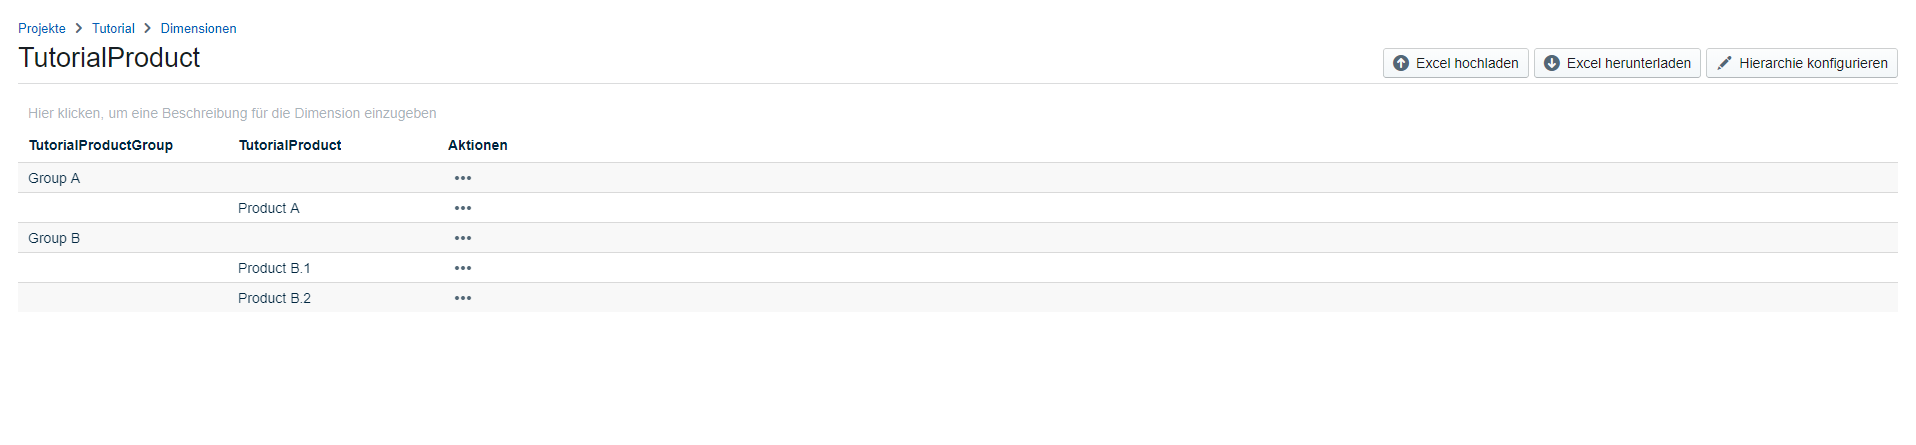
Once the file is uploaded your "TutorialProduct" dimension should look as follows:
Creating or configuring the Level Hierarchy
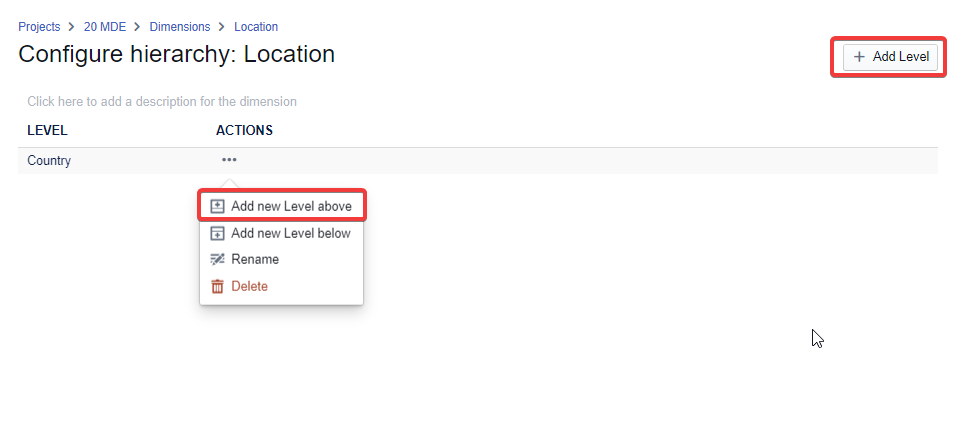
If you want to create a dimension-level hierarchy, use the configure hierarchy button on the dimension page.

You have the possibility to add higher or lower-level values.
We will create the higher level region. We can either use the add level button or the “ACTIONS” drop-down.
After moving back to the location dimension screen, we use the action dropdown to rename the regions and move the items accordingly. An animation shows the creation of the Americas and moving the USA to the region.
Extending the Base Data
We can now extend the base data in our actuals sheet to actually include the product information.
Year | TutorialProduct | Price | Volume |
|---|---|---|---|
2018 | Product A | 10 | 500 |
2018 | Product B.1 | 20 | 250 |
2018 | Product B.2 | 5 | 250 |
We replace the data file in the "Data source" from the Basic Data Upload & Model Definition step by doing the following:
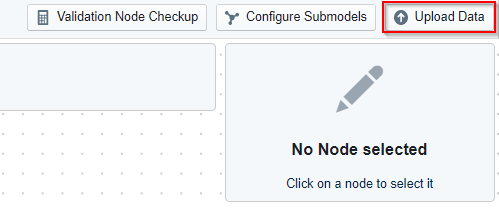
First, open the submodel you created in Create a new Model. Then select "Upload Data" in the top right.
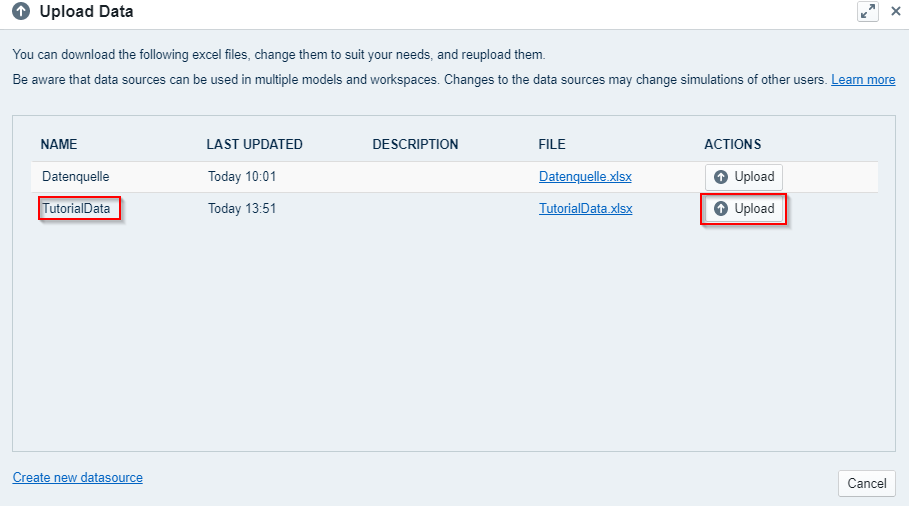
This will open the data upload wizard showing all data sources. Since we want to update the "DemoContent" data source, we select "Upload" next to it.
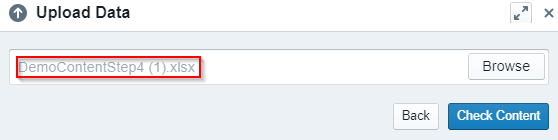
Now choose “Working with Dimensions” and select "Check Content".
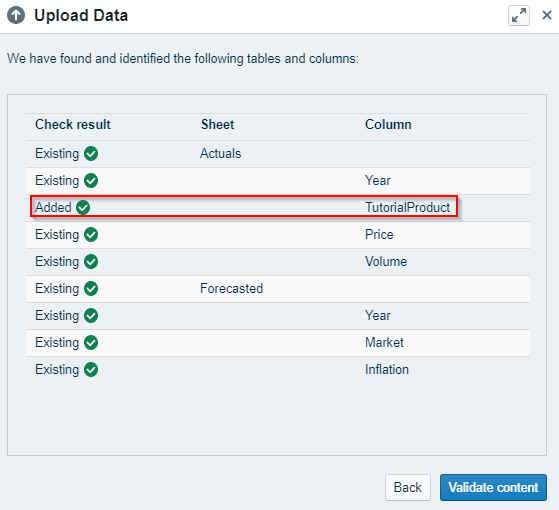
Valsight now shows you a preview of the new data structure. As you can see "TutorialProduct" was added and will be connected with the custom dimension you created earlier. You can hit "Validate Content" once you are familiar with the new data structure.
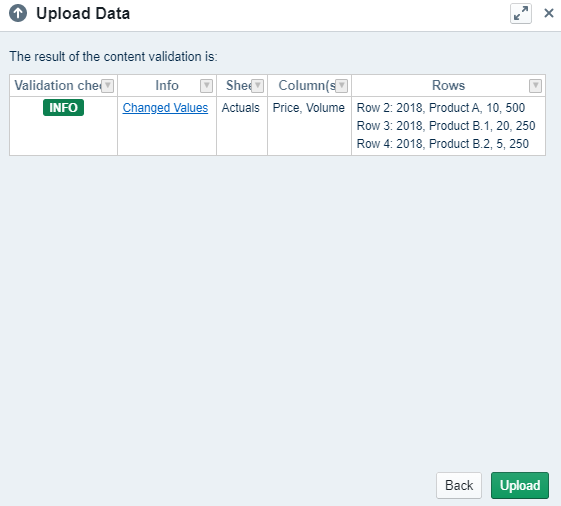
Finally, you'll receive information on what changed. After hitting "Confirm" your data source is updated!
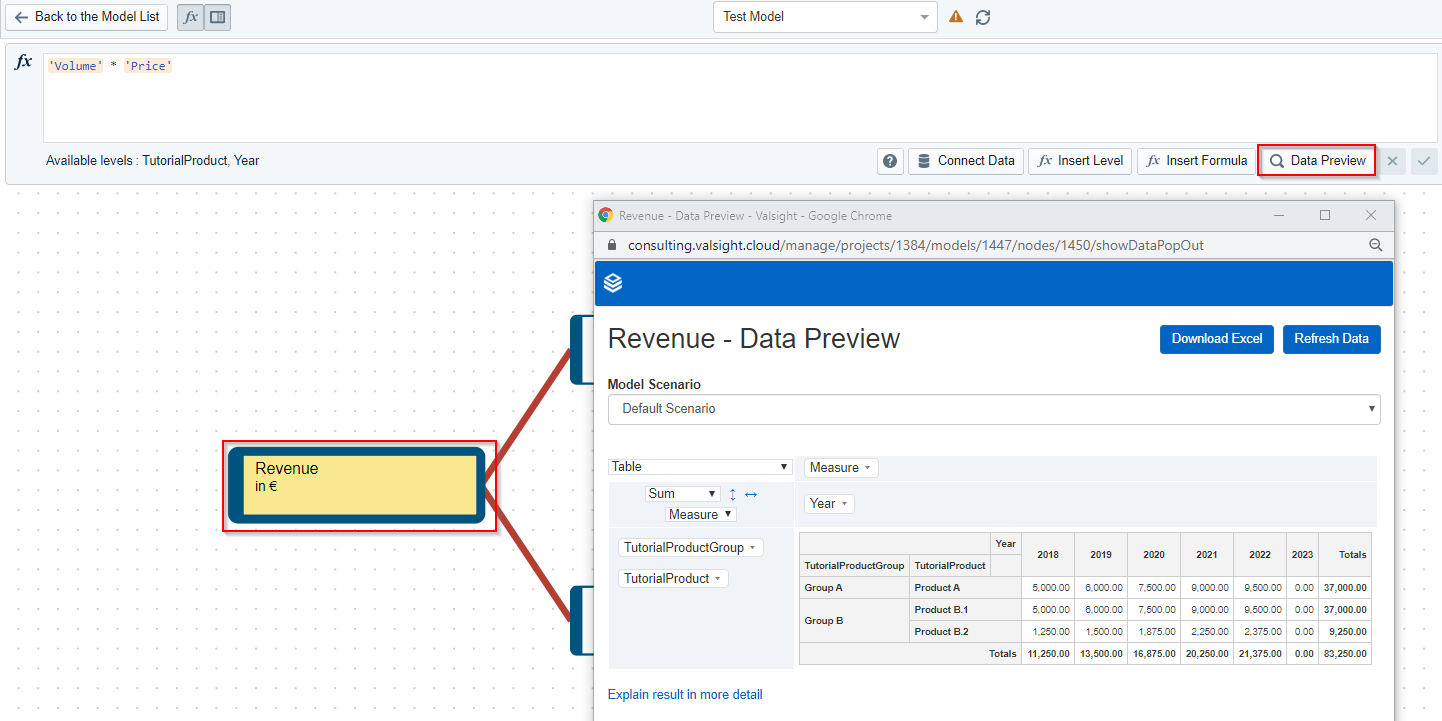
Without changing a single formula, we have changed the dimensionality of the model! Now we can check the preview data functionality by selecting "Data Preview" in the "Functions" selection (upper left corner) to verify that all data is now calculated on the product level!
Best Practices and Limitations
Each level of the hierarchy should be mutually exclusive and collectively exhaustive (MECE principle).
Every data point that is available on a level should be part of exactly one level entry, especially in summarized data - hence every physical Euro, case, plane, or car is part of one level value in one level of the hierarchy.
Example:
A company is operating in 15 countries which are all in different countries. Therefore, three hierarchy levels are created. The highest level is 'World'. The second level is 'Continents'. The third level is 'Countries'.
In the model, those 15 countries should be categorized according to the 'continents' level (EMEA, Americas, APAC). In this case, the best performing countries have been inserted as single-level values (FRA, DEU, USA, etc.) whereas the others have been summarized as 'Rest') within their affiliation.
Following the above rule, countries that do not belong to either of the three 'continent' levels, still need to be sorted into a level. They cannot be stored as extra level values in 'Continents' as this would place them on the same hierarchy level as EMEA, Americans, and APAC, so one level above the regular countries (not mutually exclusive).
Therefore, the level value Rest of World is created (collectively exhaustive). This level contains the value "RoW" which contains the values for the countries.