
Part 5: Simulate
In this part, you create a workspace, set up assumptions in the Scenario Manager, and activate a simulation scenario.
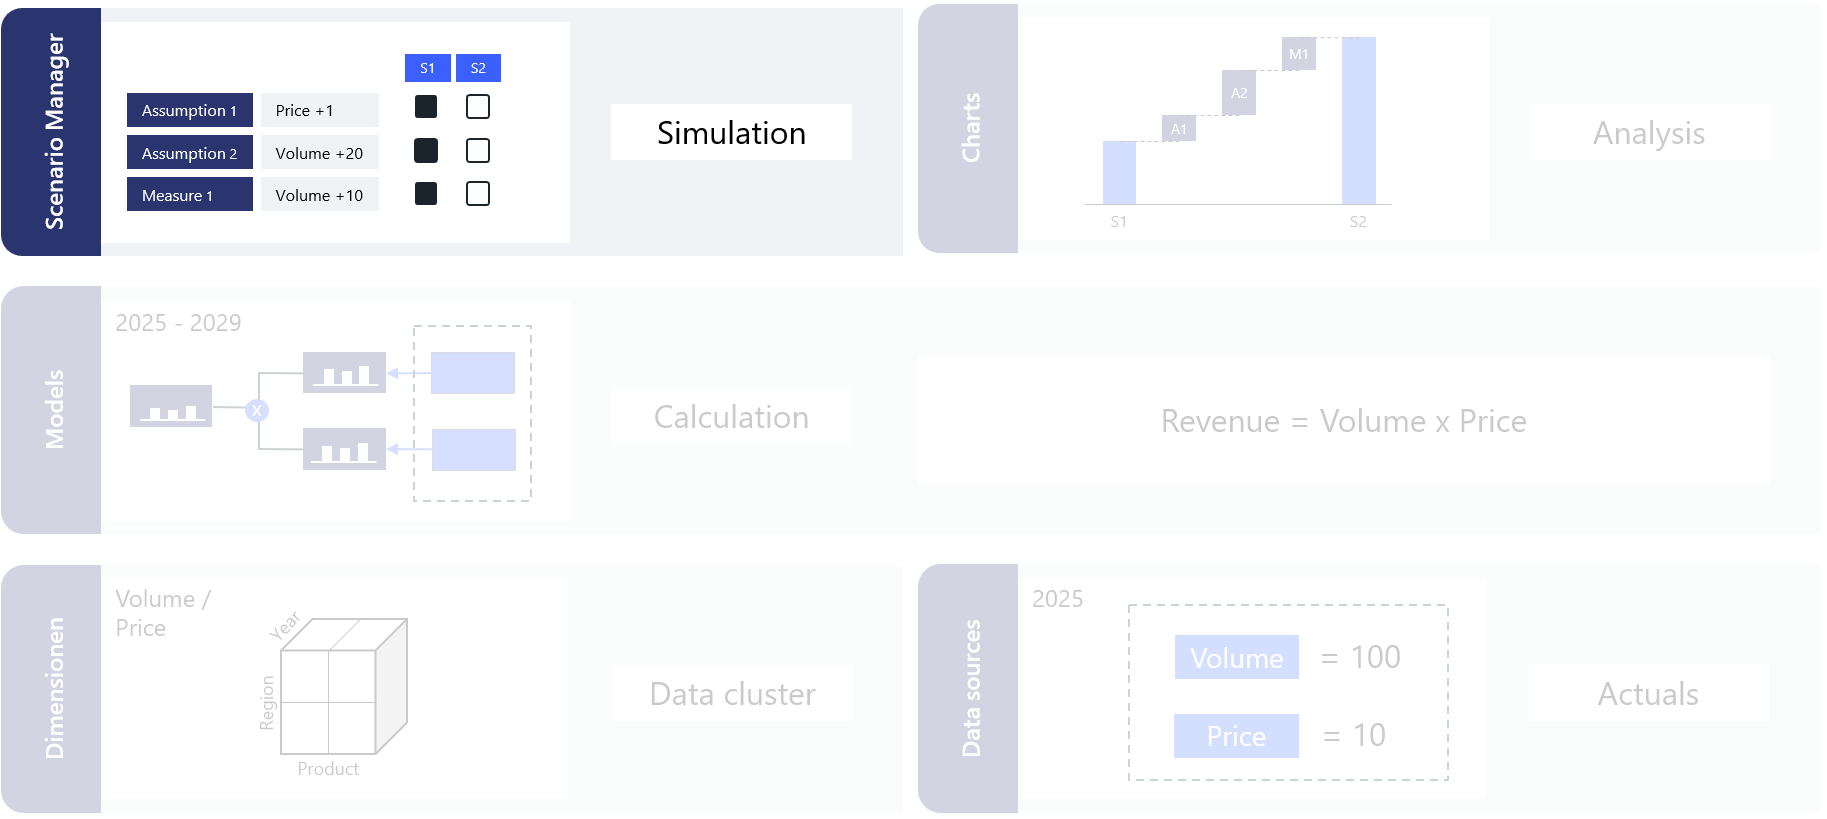
Simulations in Valsight start from a data baseline, apply line items to simulatable nodes, and calculate scenarios as changes on top of that baseline.
For detailed reference on any of the concepts here, see Workspaces and Scenario Manager.
Watch the video guide
Step 1: Create a workspace
A workspace is where you analyze results and run simulations.
Go to the Workspace overview within your project.
Click Add.
Enter the workspace details:
Field | Value | Notes |
|---|---|---|
Name | Revenue Driver Simulation |
|
Model | 100_P&L | Select the topmost submodel. |
Default scenario | Data | The baseline with no assumptions active. |
Click Create.
Open the workspace.
Step 2: Set up the Scenario Manager
The Scenario Manager is where you define assumptions and scenarios.
Create the Price Adjustment assumption
Open the Scenario Manager.
Click Create assumption.
Enter the name Price Adjustment.
Add a line-item
Click the + icon on the assumption.
Select the simulatable node Price Adjustment.
Choose Absolute.
Click Create.
Enter a premise
Click on the line-item name to open the input table.
Enter
10forPremium / USA / 2026in the Change column.Click Save.
Create the Volume Change assumption
Create a second assumption called Volume Change.
Add the simulatable node Market Growth.
Choose Absolute.
Enter growth values.
Click Save.
Activate the assumptions
Activate both assumptions for the Simulation scenario.
What you have done
Created a workspace
Set up two assumptions in the Scenario Manager
Activated the simulation scenario
Next step
Continue to Part 6: Analyze Results.