
Sharing Exports
With the introduction of the Export Manager, it is now possible to provide access to exports for other projects in the same Valsight instance. In this way, the target project(s) can directly access and import your exports as a data source, for example to duplicate your nodes and scenarios.
You can do this by checking the 'Share with other projects' box when creating an export.
Alternatively, you can share an export after it has been created using the Export Manager. Open the export Settings using the three dots menu and navigate to the 'Edit Target Projects' tab. Activate the checkbox and select the desired projects you want to give access to this export.

Sharing an export will automatically save the export indefinitely.
Search and select one or multiple projects which you wish to share this and every future version of this export with. The project will then be granted access to view and import this export into their data sources.
Importing Shared Exports
To import an export from another project that has been shared, navigate to your project's Data sources. Create a new data source from the External Project tab and fill in the form for your desired export.
Select the source project from which to import data from
Select the export
Select the desired version of the export (the latest version will be imported if left blank) (see below, 'Versioning)
Select the tables to import, aka the nodes. Leave blank to import the entire export
Choose the exports name as the name for the data source or assign a custom name.
To restrict access to this data source, assign it to a specific model in your project.
Note that you will need to ensure that the dimensions are the same between projects so that you can use the export in the target project without any problems.
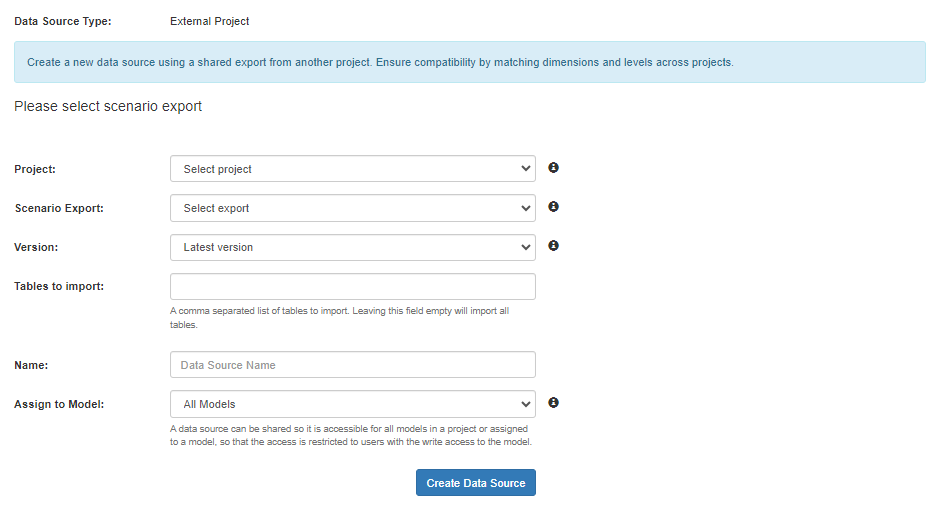
(Destination Project) Data Sources > Create Data Source > External Project
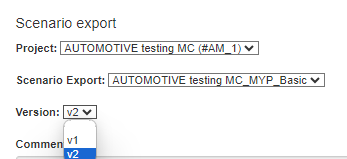
Versioning
Giving access to an export allows you to update it if you make any changes. The target project will be able to update the export to the latest version. You can create a new version after making changes to the model or scenario in the export manager. Click on an export to view the version history and click “add new version”.
If you only want to share one version, it is recommended that you create a separate export for it.
Updating the Data Source
To update a data source to a newer version, go back to Data Sources and click on the required data source. Navigate to the 'Version' dropdown and select the newer version.
Click on ‘Re-import tables’ and confirm again to import and override the data source with its newer version.

Note: Updating a table will overwrite all previous data and may cause errors in nodes or scenarios. This step is reversible if the old version of the export still exists. Simply navigate back to the data source and re-import the previous version of this export.
See also: Export Manager