
Export Manager
Navigating the Export Manager
See below a brief overview over the key functions of the Export Manager. To learn more about a specific functionality, simply navigate to the sub-page.
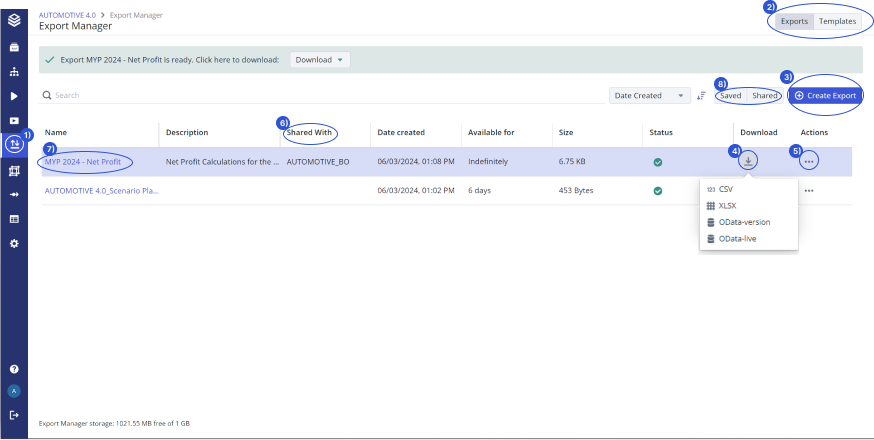
Export Manager Overview
1. Accessing the Export Manager
Access the Export Manager through the Icon (1) on the left navigation bar. The Export Manager allows you to export Scenarios, view your exports, download and share them with other projects or manager them. Non-admins can manage their own exports and downloads whilst admins can view and manage the exports of their team.

Icon
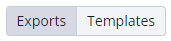
2. Template Manager
You can navigate between two tabs (2) within the Export Manager: “Exports” and “Templates”. “Exports” will present you with a list of l available exports, the possibility of creating a new export as well as managing, sharing or downloading existing exports. The “Template Manager” is only accessible for admins. It allows for the creating of templates for multiple use cases, for example later exports by pre-selecting nodes and reusing this constellation at multiple occasions. For more information regarding the Template Manager please read here.
Export Manager Tabs
3. Creating an Export
To create an export in the Export Manager, click on the ‘Create Export’ button on the top right (3). This will open a dialogue in which you can chose a model, scenario and nodes to export. Alternatively, you can also create an export directly in the Scenario Manager. This will calculate and create the export and save it in the Export Manager for further use. Note that this process might take a while depending on the size of the nodes. You can continue working elsewhere ,as the export is being created in the background. Once the export is done you will be notified via the green message in the top of the screen. Click on ‘View’ to get to the Export Manager and download the export.

Create Export
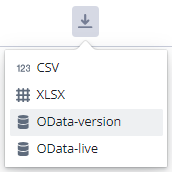
4. Downloading Exports
You can download or share the latest version of an export in various formats. It is possible to download them or create links to the export, either to a specific, the latest or a live version. To do so, you can navigate to the download button on the right of each export or directly in the callout message after creating a new export. Select the desired format and the export will be downloaded. Note, that if the latest version failed, the download button will be disabled. Either create a new version or delete the failed one.
Download Export
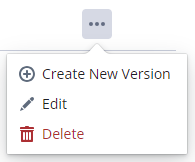
5. Managing Exports
Through the export's three-dot menu, you can create a new version of the export, delete it, or edit it.
Export Three-dot-menu
Editable features are: ‘Shared projects’, ‘Export Expiration Date’, ‘Name’ and ‘Description’.
Deleting an export will delete all its underlying versions. Projects with access to these versions will no longer be able to import them. However, if a project has already imported this export, the Data Source will not be deleted.
6. Sharing Exports
A key functionality of the Export Manager is the ability to share exports with other projects. To do this you can either select the option directly in the creating export dialogue or allow this at a later stage through export settings. To share, check the box “share with other projects” and select the desired projects from the list of available projects to you. Once created, users from the destination project will be able to import the scenario export as a new Data Source just like they would import any other Data Source through the tab “From another project.

Sharing an Export
You can share exports on a per-export level with other project. This will allow these projects to import any current and future version of this export unless access is revoked.
7. Versioning
The Export Manager allows you to version your exports as well as view an exports version history. When creating the first export for a scenario, a first version is automatically created. The export and its versions share the given name, which can be changed at any time to a custom or different name. You can create a new version of an export at any time on an available export from within the Export Manager. Simply click on the three-dot menu of an export and click “Create new Version”. If no custom name is assigned, a custom name will be generated. It is recommended to add additional information about the version in the description.

New Export Version
To view the versions of an export simply click on an export to view the version history page. Here you can see a list of all available versions of an export, as well as delete and download them through the three-dot menu.
8. Navigating the Export Manager
There are multiple tools which help you navigate and manage your exports faster and simpler. Apart of the search bar, which allows you to search for an exports name, description or creation date, you can filter your export list with the quick filters ‘saved’ and ‘shared’. These filter the list for all exports which are saved indefinitely and shared with other projects respectively.

Export Manager Quick Filters