
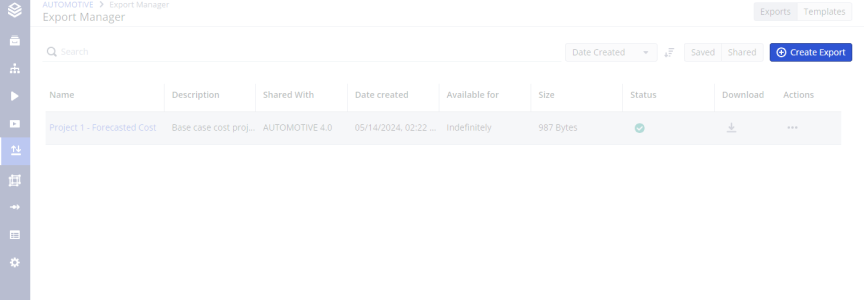
Creating and Downloading an Export
In order to create and download, save or share a scenario export, you must create an export first. This export will be saved in the Export Manager and can then be downloaded and managed. You can either create an export via the Scenario Export in the Scenario Manager or directly within the Export Manager. Start by clicking the blue ‘Create Export’ button in the top right corner.
Creating an Export
Select a Scenario
To create an export from within the Export Manager, select the workspace and the desired scenario to export. To export the nodes and calculations without simulations, simply select the scenario ‘Basic’.

Creating a new Export
Alternatively, you can create an export directly from the Scenario Manager. View the documentation here to view how.
Then chose one or multiple nodes which should be exported with the scenario context. You can select all nodes, single nodes or custom nodes using templates.
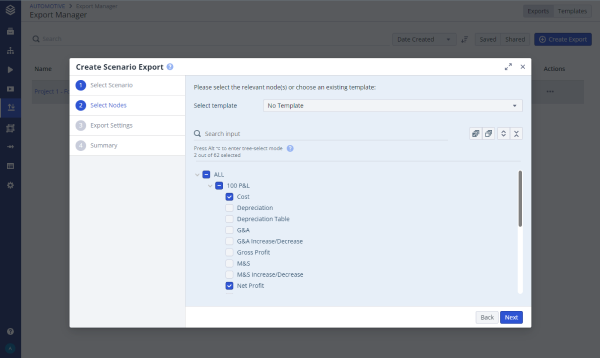
Select Node(s)
Export Settings
(Optional) select a name, description and define the exports storing option. A custom name and/or description can be added in order to find it easier later on. This is recommended for exports which will be shared with another project. The name will be auto-generated through a combination of project name, workspace and scenario name if left blank. You can skip this step altogether if you only wish to download the export.
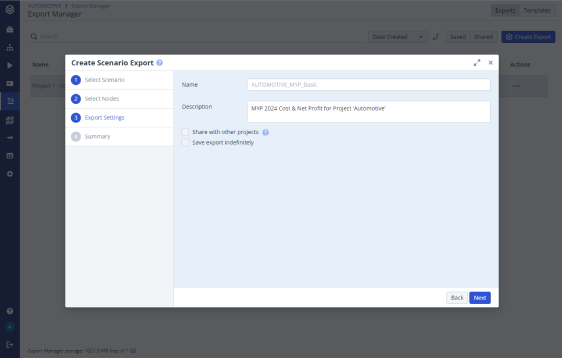
Export Settings
Creating the Export
You can now go ahead and create the export. Note that this is not yet triggering a download but pre-calculating, creating and saving an export which can then be downloaded.
You will be able to chose a format and download the export after it has been successfully created.
Depending on your project’s size, this can take a while. As this process is being handled in the background you can go ahead and continue working elsewhere. You will be notified as soon as your export has been created As soon as you trigger the creation of an export, it if will appear in the export manager, along with it’s creation status.
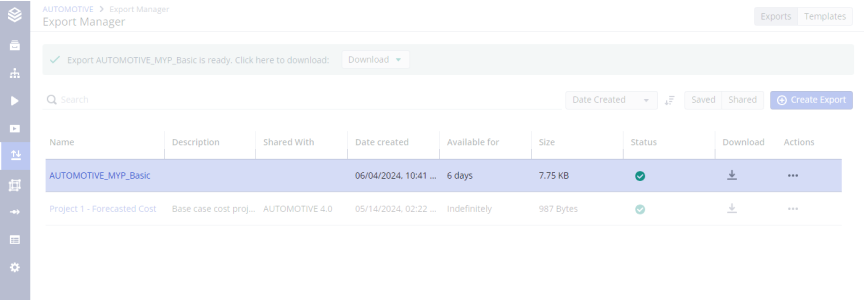
View Finished Export
Downloading the Export
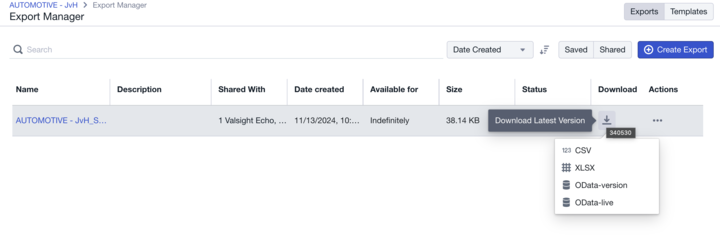
The download can either be downloaded via the exports ‘download’ button:
.png?inst-v=d6602ca4-2558-4df5-ae35-c8d56235622f)
Download Button
Or directly via the green callout message on the top of you screen which will appear as soon as the export has been successfully created:
.png?inst-v=d6602ca4-2558-4df5-ae35-c8d56235622f)
Download Message
The available download options are Excel and CSV. It is also possible to create an OData link to the export to i.e. connect an external dashboard with this Scenario. Please view the export format documentation to learn more about various OData link types and how they work.
Downloading a Specific Version:
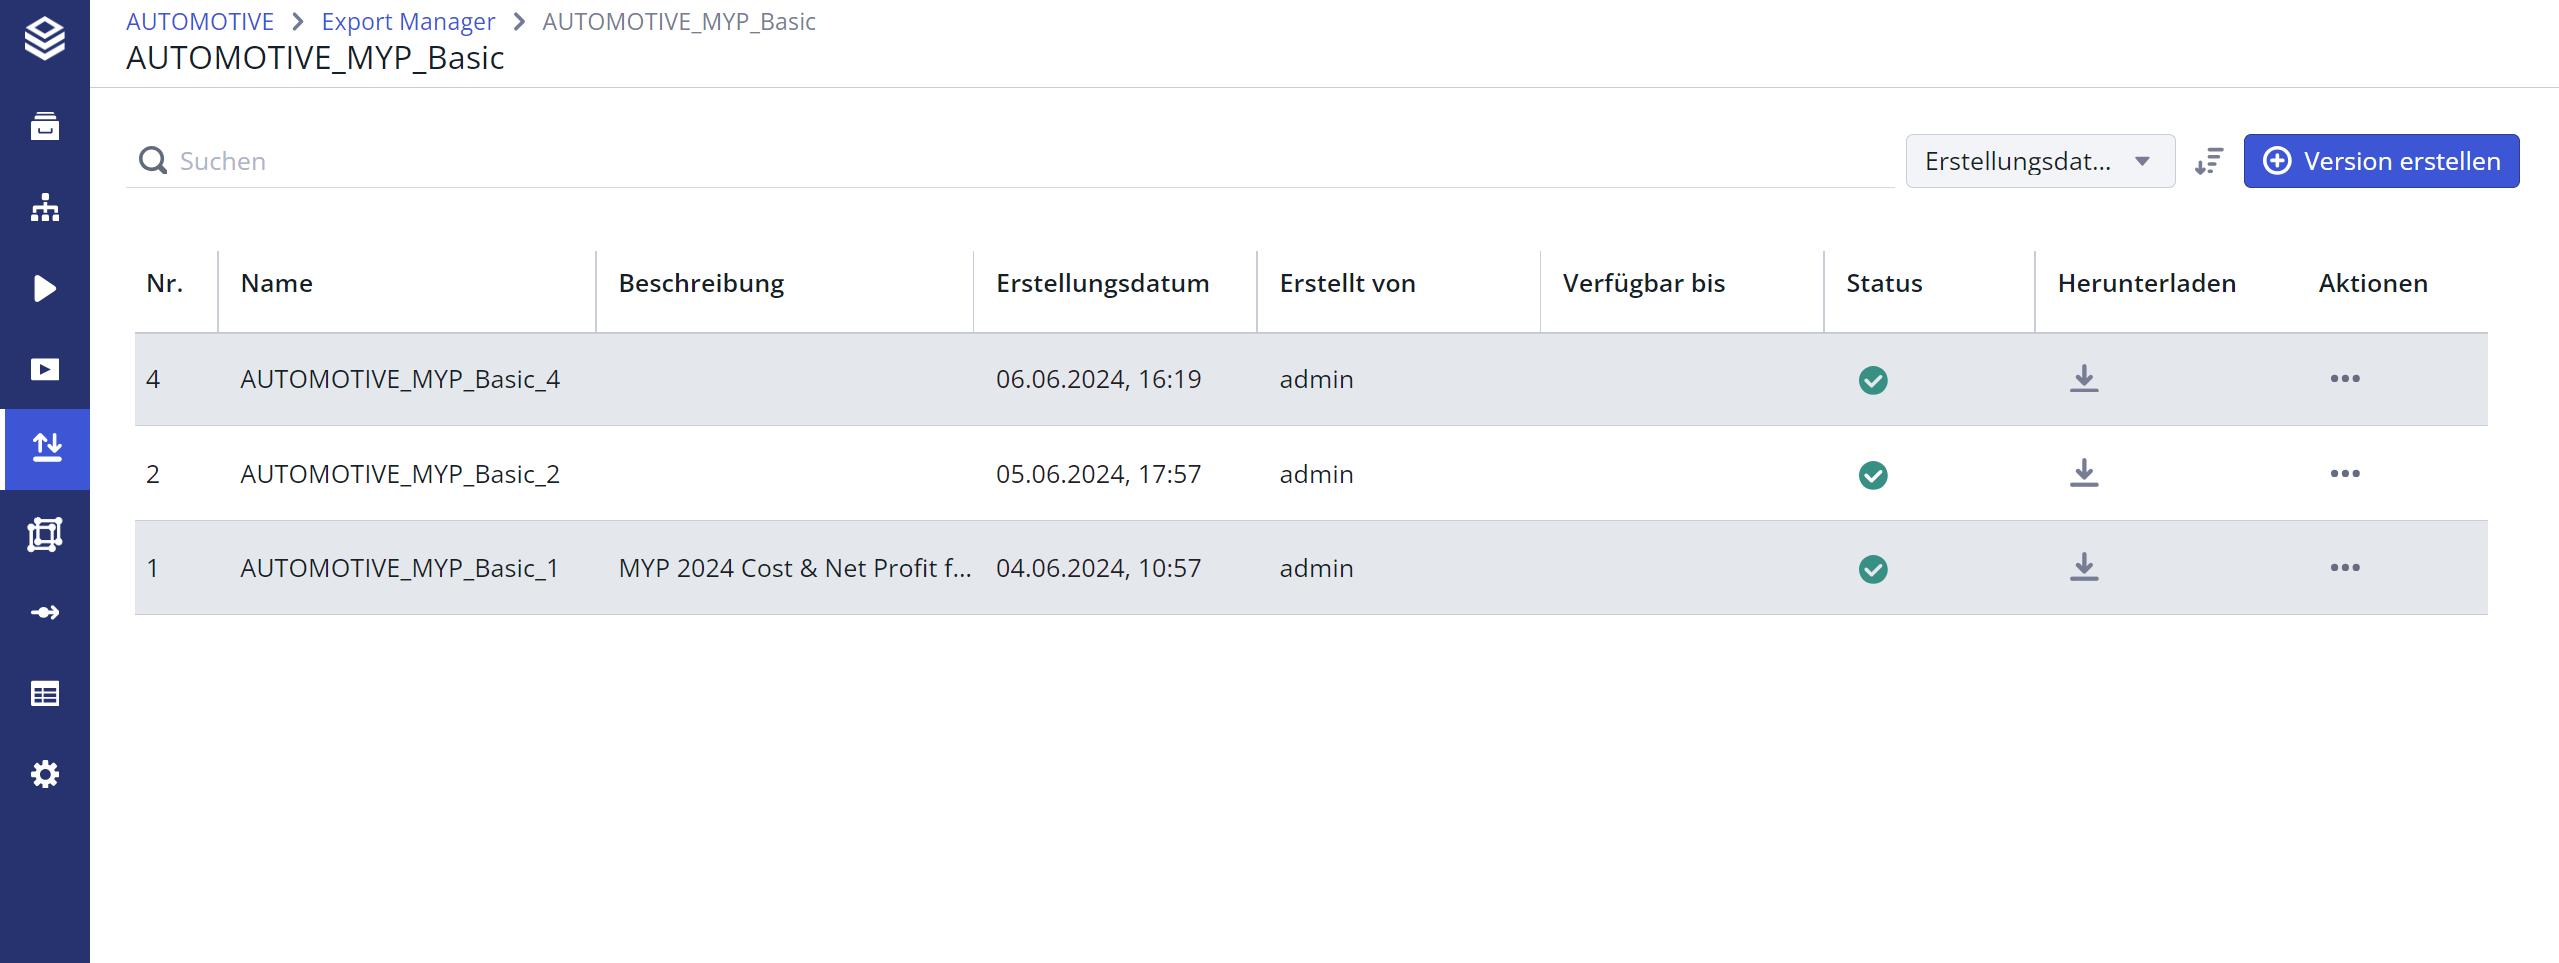
Export Version History
If you wish to download a specific version of an export, click on the export’s name to navigate to its version history. Here, you can select a specific version, the latest or an older one. Click the download button and select a download format just like on the export overview page.
Building a URL to Download the Latest Version of an Export
You can programmatically download the latest version of an export by constructing a URL. This allows external tools or scripts to access the most up-to-date version of your export directly.
URL Format
The URL structure is as follows:[appUrl]/scenarioExports/[exportID]/exportLatestAsCsv
[appUrl]: Replace this with the base URL of your Valsight instance (e.g.,https://example.valsight.com).[exportID]: The unique identifier for the export.
Finding the Export ID
To locate the Export ID:
Navigate to the Export Manager in the application.
Hover over the download button next to the desired export.
The Export ID is displayed in the tooltip or URL preview, as shown in the example below:
Example ID:
123456Complete URL:
https://example.valsight.com/scenarioExports/12345/exportLatestAsCsv
Important Notes
Use the Export ID, not the Version ID:
The Export ID ensures that the latest version of the export is always downloaded.
Using a Version ID would link to a specific, potentially outdated version.
Authentication: Ensure the user or system executing the URL has the necessary permissions to access the export.
See also: Export Manager