
Template Manager
Basic Overview
The Template Manager can be found through the tab in the top right corner of the Export Manager and allows users to manually create customized export templates for the desired use case. These templates allow a more flexible node selection when exporting scenarios, but also provide a standardized frame for recurring exports. These templates are saved and editable in the template manager. Templates can lead to a reduced number of data exported, which leads to slower loading times.
The template manager can only be accessed by users with project admin rights for the respective project and being either “Simulation User”, “Model User” or “Unrestricted User”. (More on user types and access rights can be found here.)
Step-by-Step Approach
Template Manager
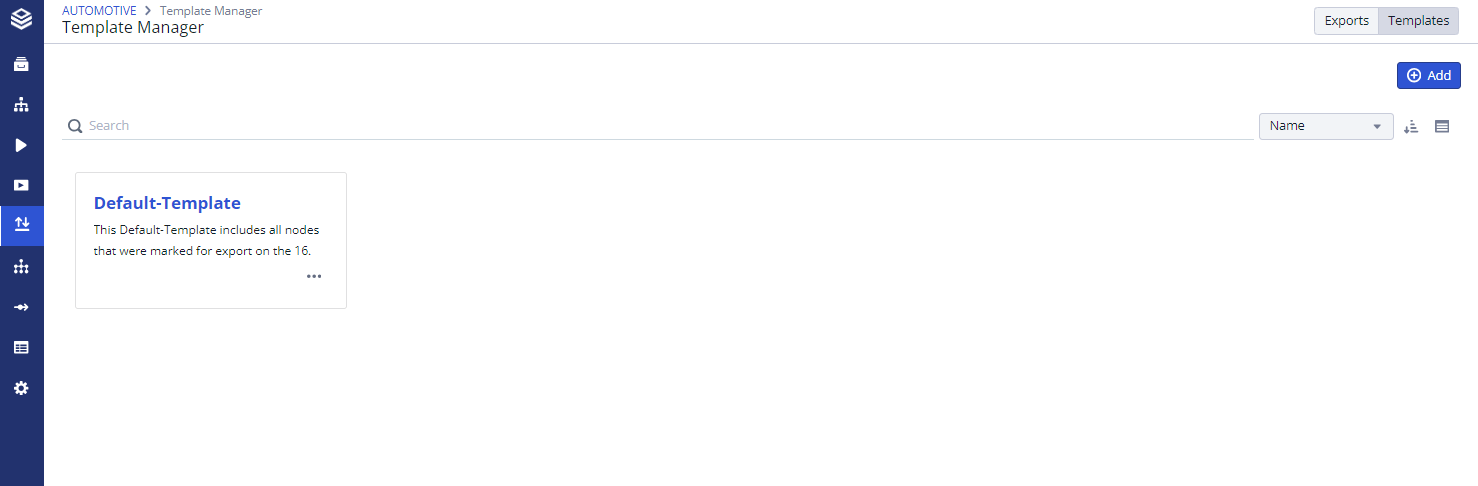
Navigate to the template manager via the ‘Templates’ tab in the top right corner of the Export Manager.
When you use the manager for the first time, an empty space will be shown.
Export Manager > Templates
2. Create a template
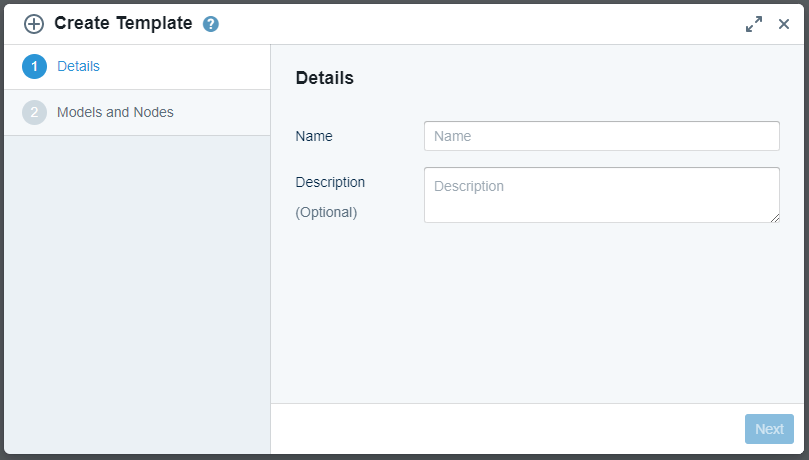
After using 'Create a Template', a dialog opens that allows you to enter a name for your template and a description (optional).
3. Models and nodes
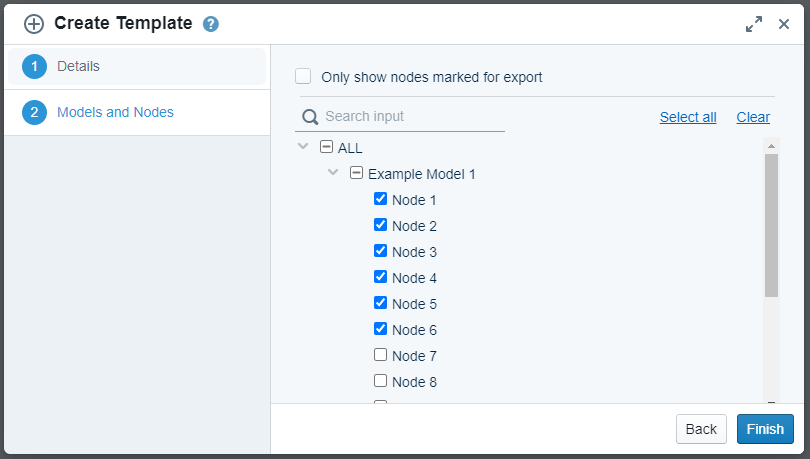
In the third step, you can customize your template based on your needs and preferences. All models and nodes accessible to you are shown below. Select the nodes that should be included in the export. To simplify your choice, you have the option to 'Only show nodes marked for export'. Nodes can be marked for export in the node editor.
With the search function, you can specifically look for certain nodes and select those.
After selecting the relevant nodes, 'Finish' will create the template.
4. Templates
After creating a template, it will be listed in the template manager with information about the creator, the date created, and the last change.
Edit Existing templates
A template can still be edited after creation. To do so, navigate to the template manager, and click on 'Edit' in the Actions menu.
In this menu, templates can also be deleted.
What Templates can be used for
The template manager has been integrated to simplify export processes and to avoid including all accessible nodes.
Therefore, the template manager can be used to export all kinds of Valsight-specific data and their nodes.
So far, this can be exported:
template usage | Available Since |
|---|---|
Scenario exports | 5.2.0 |
Usage of Templates
An example of how to use templates would be to export a scenario based on one.
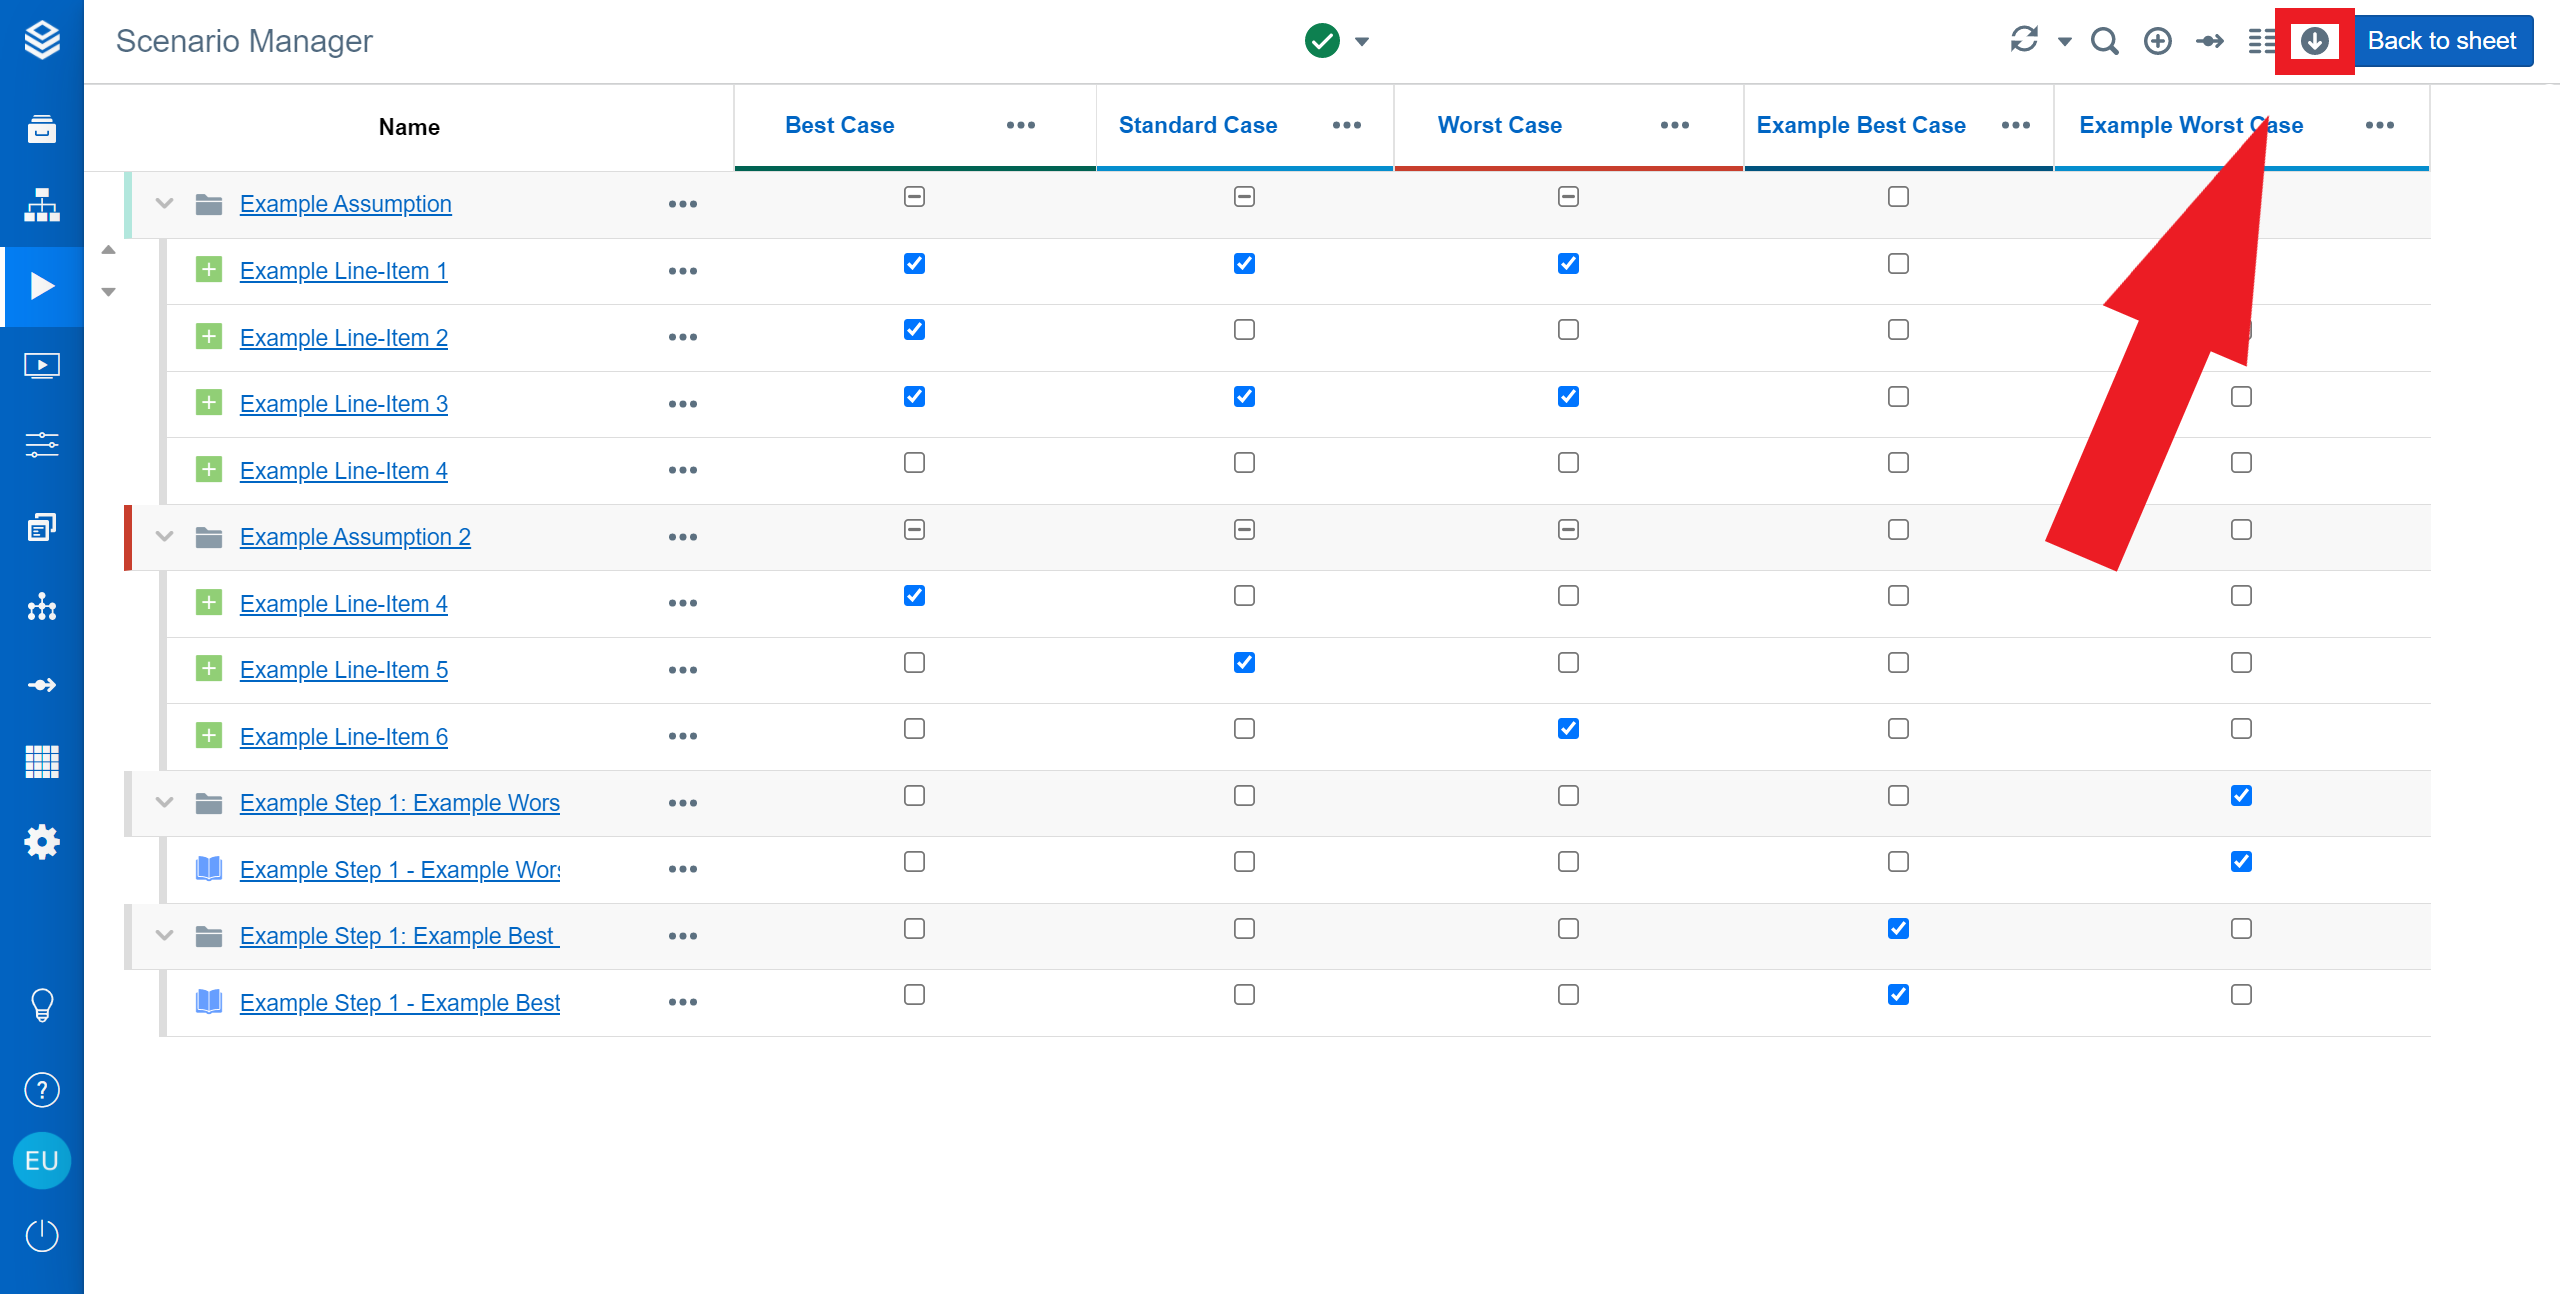
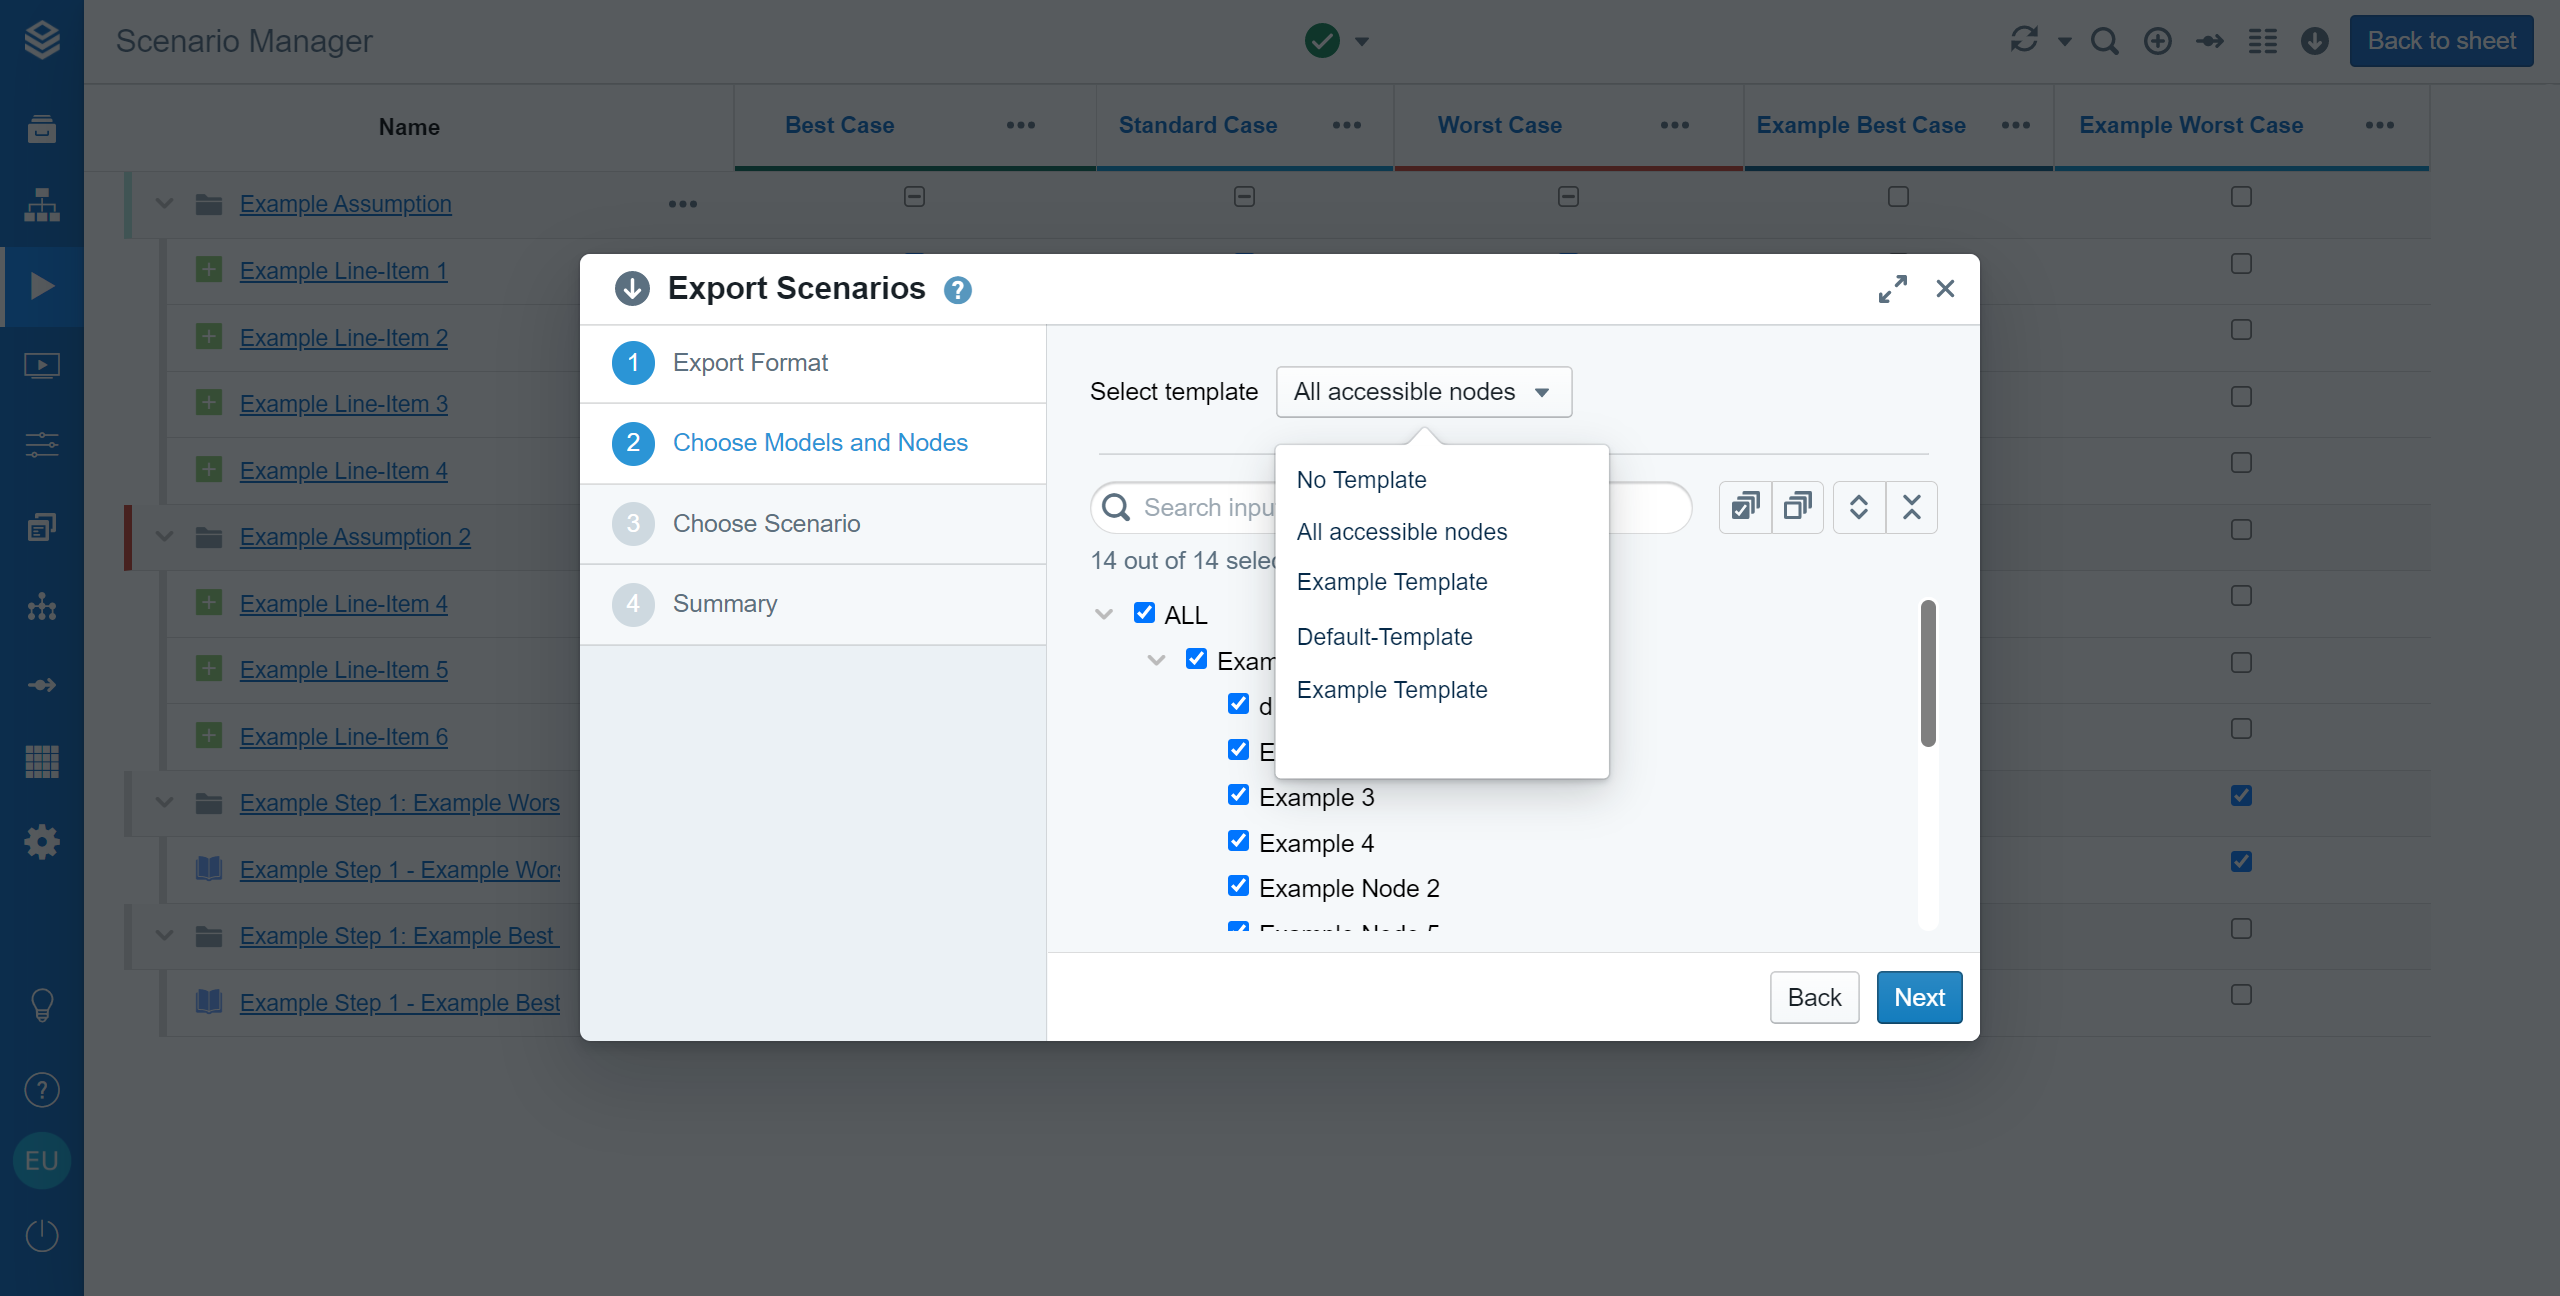
To export a scenario, navigate to your workspace via the navigation bar and open the Scenario Manager. Open the “Export Scenario” dialog by clicking on the corresponding button.
In the “Export Scenarios” dialog, the first step is about choosing your export format. In the second step, you can now choose one of the previously created templates in the dropdown. The export based on a certain template will then include all activated nodes automatically, without the need for users to go through all nodes and models every time an export should be made.
To finalize your export, navigate to the summary step and use ‘Finish’.
See also: Export Manager