
Adding a Custom Dimension
Basic Overview
This page is part of a tutorial. If you have navigated to this page directly you may start the tutorial at V2 - Building a First Model - Step by Step.
Alternative 1 is available since Version 4.4.0.
The data we uploaded so far only uses the built-in time dimension. We will now add a custom location dimension/product dimension, and change the data to actually use the dimension.
Following the rules outlined in the Dimension & Hierarchy Management, we navigate to the Dimension Manager and create a new Dimension.

Two Alternatives
To fill your dimension with values, there are two alternatives. Both will be described below.
Adding Dimensions
Alternative 1
AVAILABLE SINCE 4.4.0
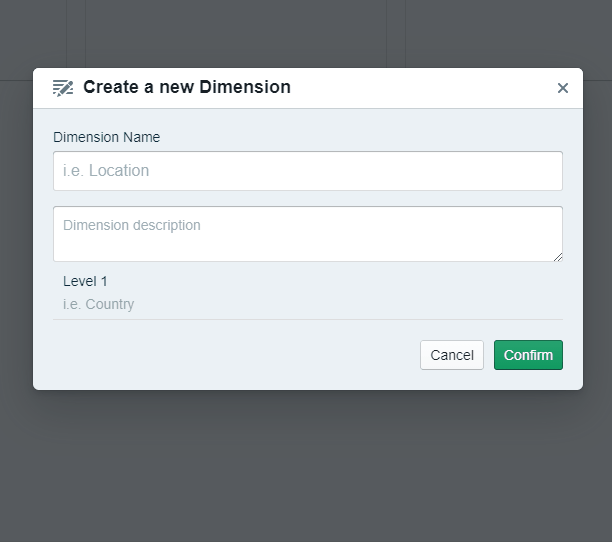
A pop-up window will open that enables you to enter a dimension name, and description and already add multiple levels to your dimension.
In this case, the dimension is named 'Location' and consists of three levels: Continent, Country, and City.
After entering the first level, press 'Shift + Enter', and the entry field for the next level will appear.
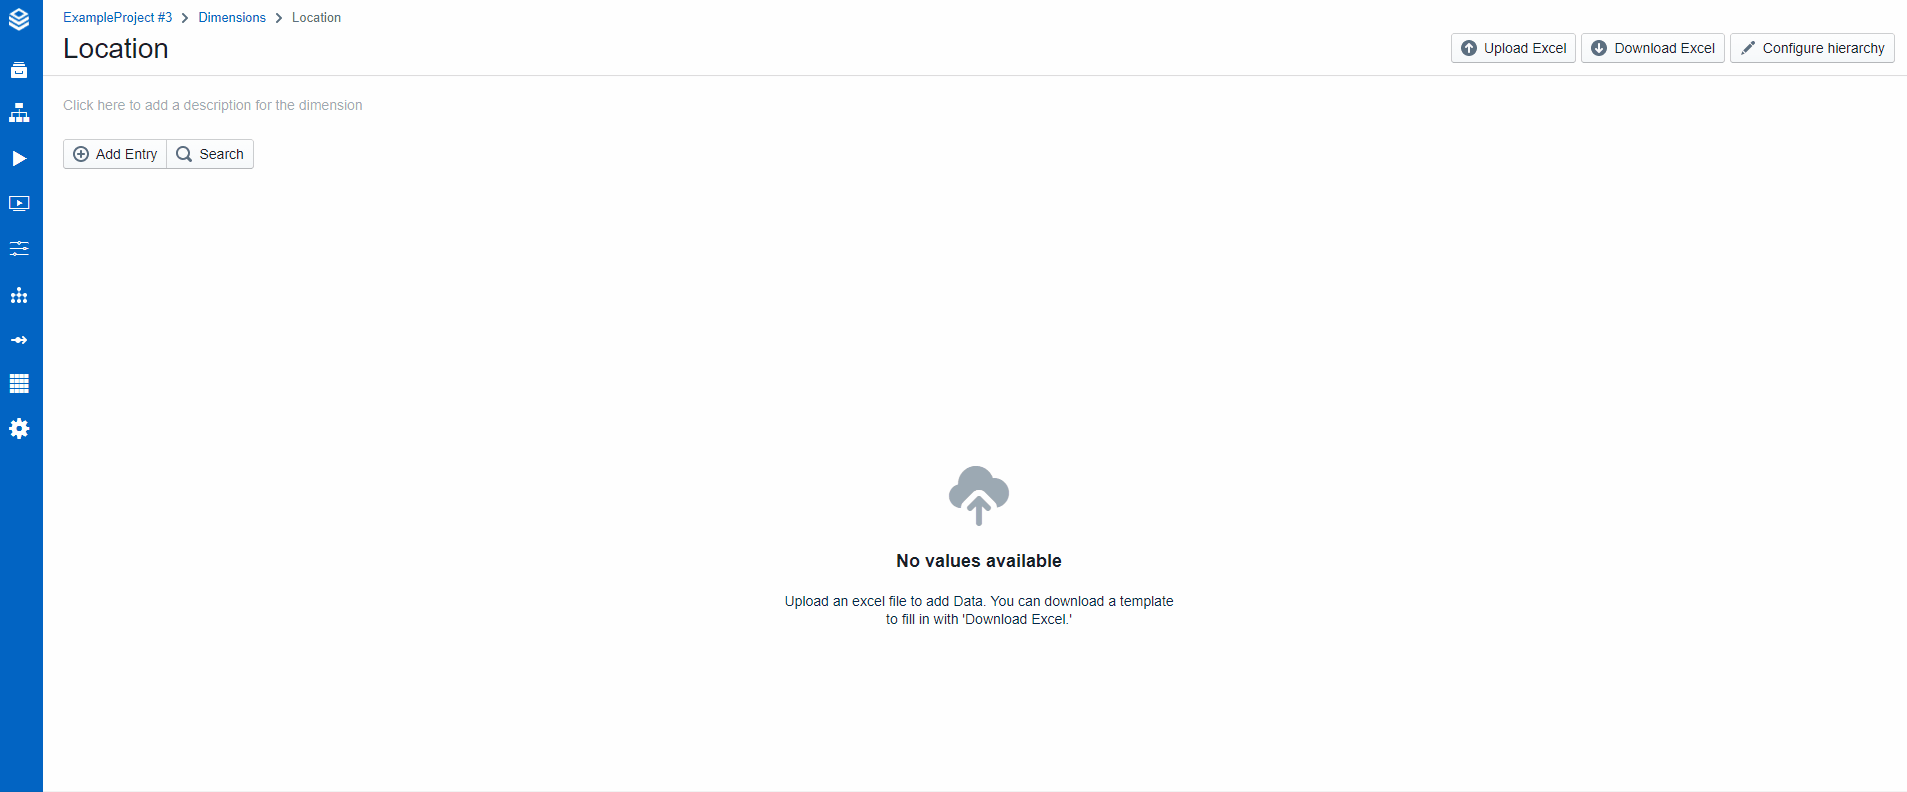
The next screen after you confirmed the dimension name and its first levels shows you that you have not yet entered any values for those levels.
Therefore, the next step will be to fill the three first levels with content.
Click on the 'Add entry' button in the upper left corner. A drop-down menu will open.
Enter the name of the first level entry you want to add and click on 'Create value....'
Do the same for the second and third levels (for the third level you do not need to click on 'Create value....')
Click Add and the values will be added
Create new values
To create new values for each level you need to enter the name of the value you want to enter and click on 'Create value....' or press enter. This is not necessary for the last level.
Adding rows to levels
With the Valsight release 4.4.0, users are now able to add rows to the levels without uploading a new excel file.
Now, rows can be added with the 'add entry' button.

This process is also possible with linked levels.
Alternative 2
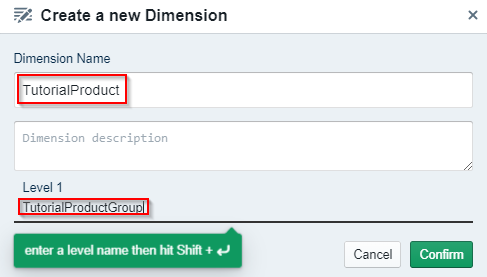
Name the dimension "TutorialProduct" and the Level 1 "TutorialProductGroup".
After creating the Dimension we want to configure its Hierarchy. Select "configure Hierarchies" in the top right to do so.

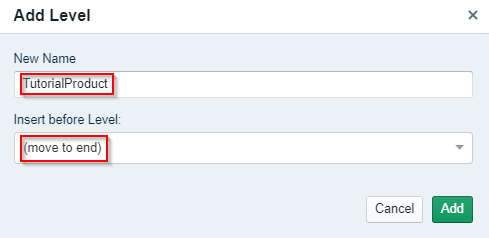
Our Dimension has two Hierarchies or Levels. The first one is "TutorialProductGroup" which we created together with the Dimension. This dimension contains the product group each product is in. The second Level is named "TutorialProduct", containing the different Product names. To create it select "Add Level" in the top right.
Now name the new Level "TutorialProduct" and insert it in the last position, since it is our lowest-ranked level.
Now that our Hierarchies are set up we can select "Download Excel" on the top right in the previous menu. This will give us an Excel file to enter our Level values.
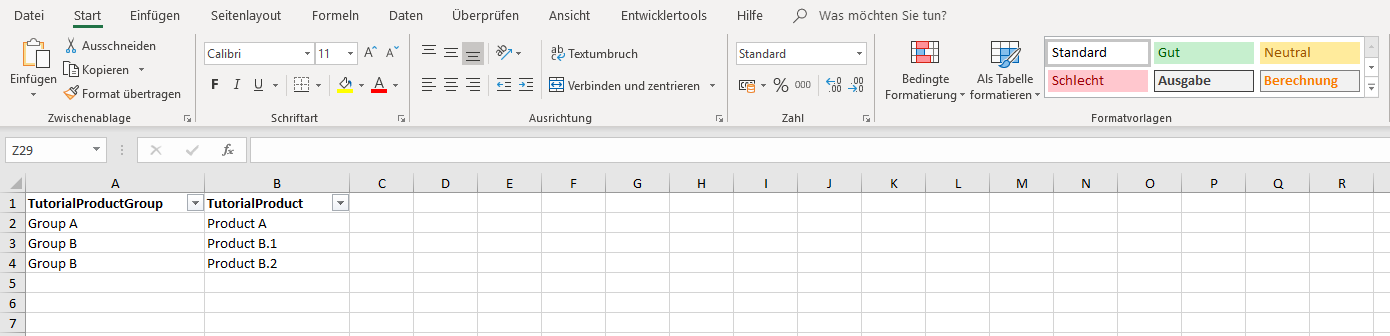
Please transfer the following values into the new Excel file:
TutorialProductGroup | TutorialProduct |
|---|---|
Group A | Product A |
Group B | Product B.1 |
Group B | Product B.2 |
The finished Excel file should look like our example:
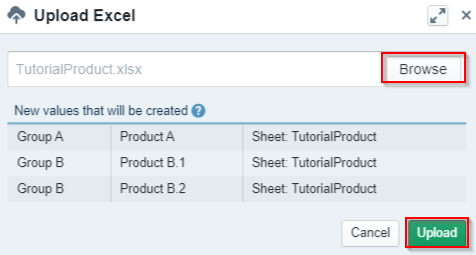
The next step is to upload the updated Excel file. To do so, select the "Upload Excel" Button next to "Download Excel". Then select the "TutorialProduct.xlsx" file, click on "Preview" and lastly on "Confirm".
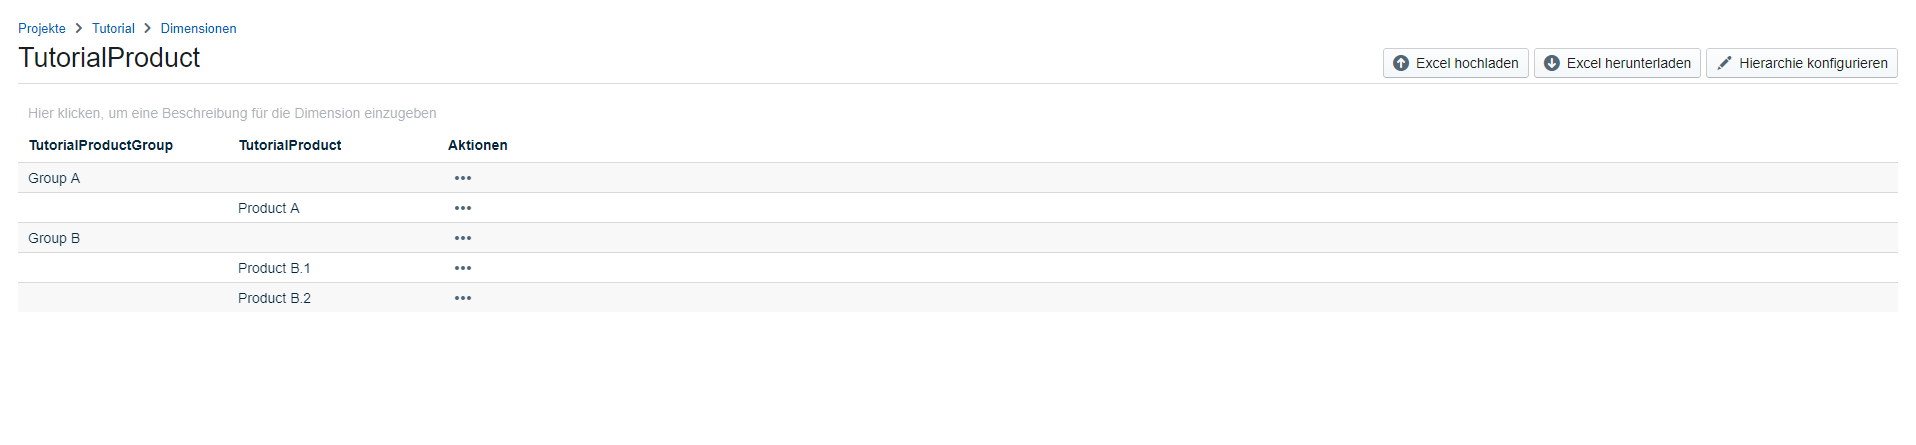
Once the Excel is uploaded your "TutorialProduct" Dimension should look as follows:
Extending the Base Data
We can now extend the base data in our actuals sheet to actually include the product information.
Year | TutorialProduct | Price | Volume |
|---|---|---|---|
2018 | Product A | 10 | 500 |
2018 | Product B.1 | 20 | 250 |
2018 | Product B.2 | 5 | 250 |
Download the Excel file: DemoContentStep4.xlsx to do so. We will now use it to update the "DemoContent" data source.
Valsight will automatically connect the "TutorialProduct" column of your excel sheet with the above dimension, because the names match! Make sure that the Dimensions exist before uploading the "DemoContentStep4.xlsx"!
We replace the data file in the "Data source" from the Basic Data Upload & Model Definition step by doing the following:
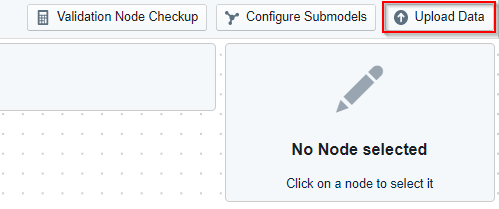
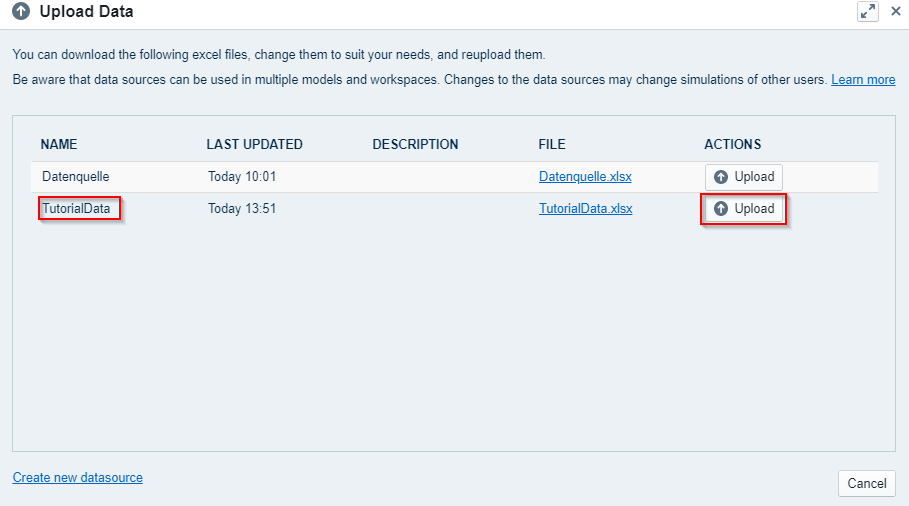
First, open the submodel you created in Create a new Model. Then select "Upload Data" in the top right.
This will open the Data upload wizard showing all data sources. Since we want to update the "DemoContent" data source, we select "Upload" next to it.
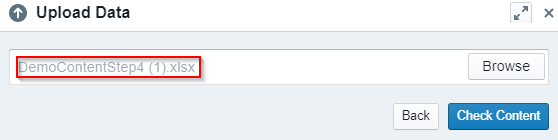
Now choose DemoContentStep4.xlsx and select "Check Content".
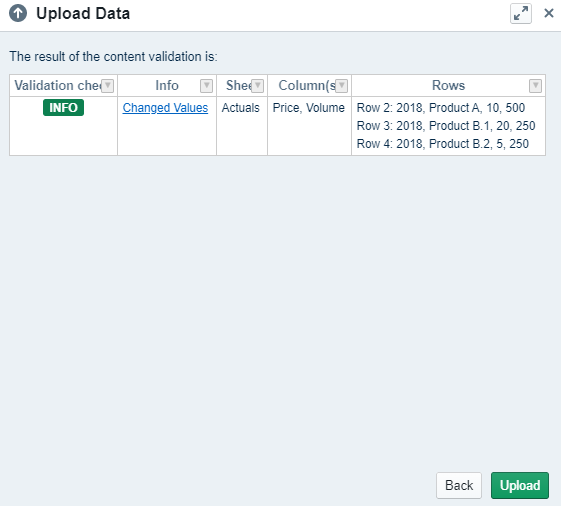
Valsight now shows you a preview of the new data structure. As you can see "TutorialProduct" was added and will be connected with the custom Dimension you created earlier. You can hit "Validate Content" once you are familiar with the new data structure.

Finally, you'll receive information on what changed. After hitting "Confirm" your data source is updated!
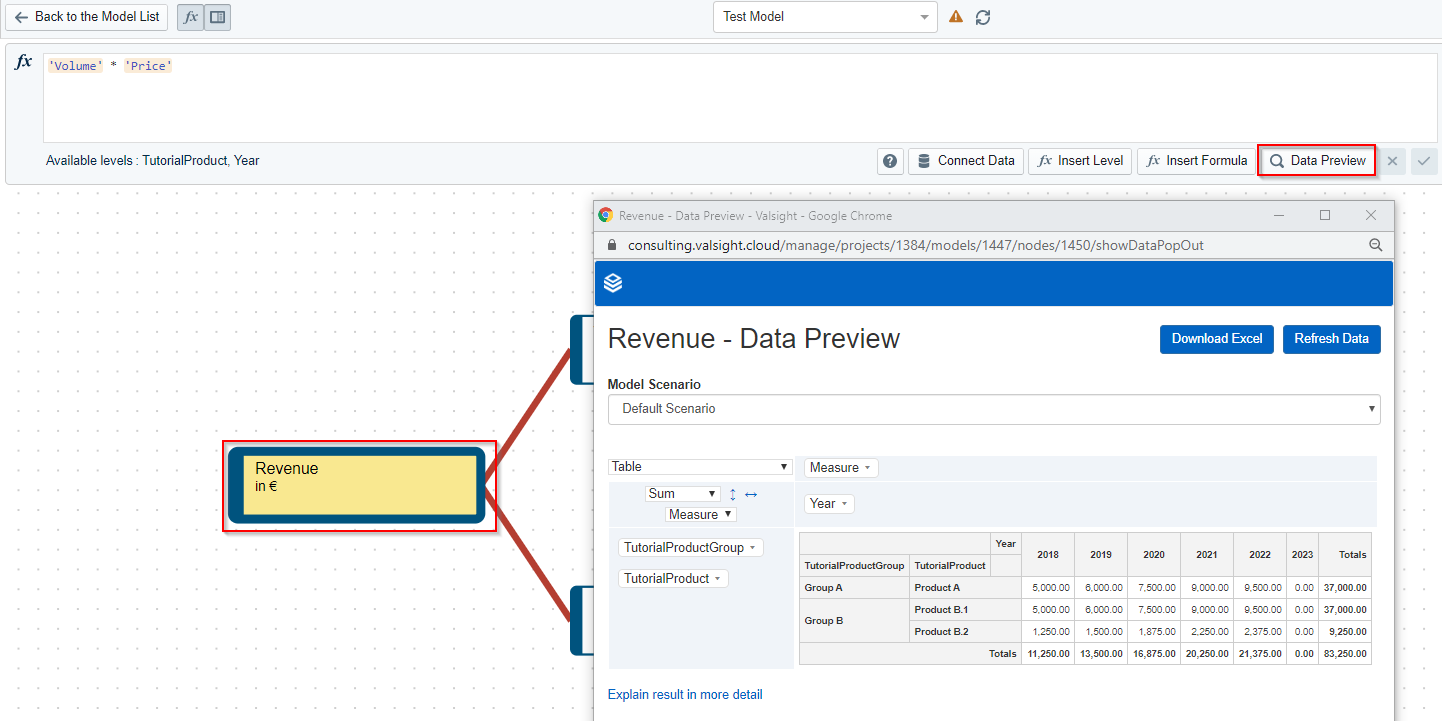
Without changing a single formula, we have changed the dimensionality of the model! Now we can check the preview data functionality by selecting "Data Preview" in the "Functions" selection (upper left corner) to verify that all data is now calculated on the product level!
Step Summary
After this step we should have data sources in our system:
The default data source of Valsight (contains the time dimension and other internal dimensions)
Our TutorialData data source (contains the Actuals and Forecasted values)
The nodes of the value driver have the following dimensionality:
Node(s) | Time | Products |
|---|---|---|
Price, Volume, Revenue, Market Share |
|
|
Inflation, Market |
| N/A |